Table of Contents
Essential 3D Printer Accessories for Creative Success
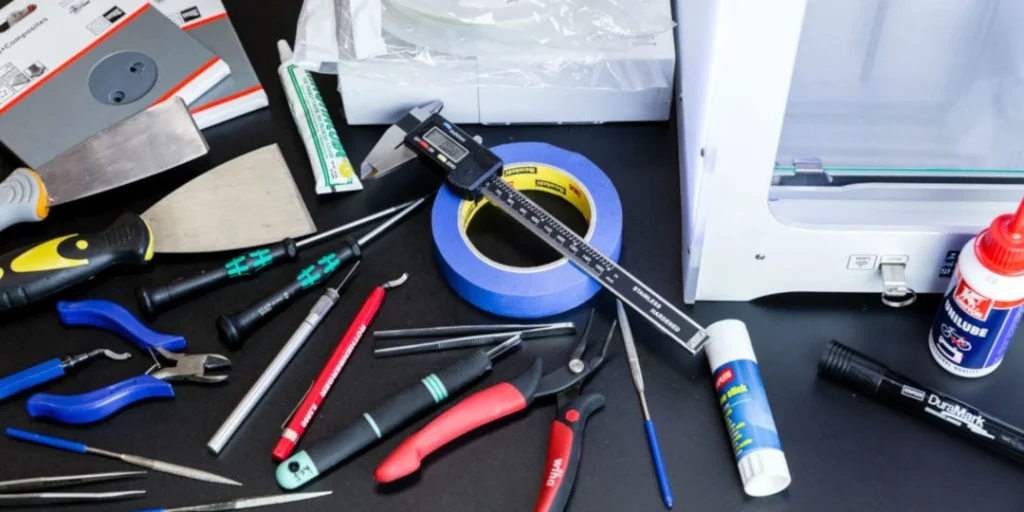
If you want cleaner first layers, fewer failed jobs, and a printer that just works, a small, well chosen kit of accessories and care items makes a big difference. This guide gives you a practical checklist you will actually use, what each item does, when to use it, and how often to replace it. It is written for home and workshop users across Australia who want dependable results from day one.
The core toolkit for routine maintenance
You do not need a drawer full of gadgets. Start with these essentials, and you will cover 90 percent of issues.
-
Digital calipers, 0 to 150 mm: Verify filament diameter, check part dimensions, and confirm spacer and shim thicknesses. Battery powered calipers are fine. Check accuracy every few months against a gauge or a 10 mm reference block.
-
Feeler gauges, 0.02 to 0.20 mm: Helpful for manual bed tramming and setting Z offset on machines without auto tramming. Use a 0.10 mm blade as a starting point for a typical first layer.
-
Hex drivers and a decent screwdriver set: Tighten frame bolts, nozzle, and heater block screws. Recheck frame fasteners every 3 months or after any transport.
-
Flush cutters and a deburring tool: Trim filament cleanly to reduce feed issues, tidy brims and rafts without stressing parts.
-
Nylon or brass brush: Clean the nozzle tip and heater block gently while warm. Avoid steel brushes that can damage coatings or short heater wires.
-
Nozzle cleaning needles or a nozzle cleaning kit: For clearing partial clogs and improving extrusion consistency. Use warm, not hot, to avoid bending needles.
-
PTFE tube cutter: Ensures square cuts for Bowden setups and filament guides. A clean cut prevents gap induced jams.
-
Lint free cloths and isopropyl alcohol, 90 percent or higher: Wipe build plates to remove oils and dust before prints.
You can bundle many of these in a single order. If you want a simple way to tick off the list, browse our 3d printer tools and 3d printing accessories sections where we group the basics without fluff.
Internal link used: 3d printer tools -> https://raven3dtech.com.au/3d-printer-accessories
Consumables you will actually use
3D printers have a few wear items and consumables you should keep on hand.
-
Spare nozzles: Stock both brass and hardened steel. Brass gives the best thermal conductivity and smoothest surface for standard filaments like PLA and PETG. Hardened steel is a must for abrasive materials such as carbon fibre filled nylon or glow in the dark PLA. For most users, 0.4 mm and 0.6 mm cover the majority of work.
-
Silicone socks: Stabilise nozzle temperature and keep plastic from baking onto the heater block. Replace when torn or when they feel loose.
-
Spare PTFE tube and couplers: Replace if you see oval wear, scorch marks near the hot end, or increased friction during loading.
-
Bed adhesives: PEI sheets, textured plates, glue sticks, or purpose made adhesion solutions. Rotate based on material, for example, smooth PEI for PLA, textured PEI for PETG to reduce over bonding.
-
Lubricants: Light machine oil for smooth rods, PTFE or lithium grease for lead screws, and a light synthetic grease for linear rails if your rails are open. Apply sparingly, wipe excess, and keep dust away.
-
Cleaning supplies: IPA for plates, a mild degreaser for metal parts, and compressed air for electronics. Avoid spraying into bearings.
If you want a ready to go bundle, our 3d printer maintenance kit section pulls together socks, cleaning tools, and common spares so you can service quickly.
Internal link used: 3d printer maintenance kit -> https://raven3dtech.com.au/3d-printer-maintenance-repair
How often should you replace the nozzle on a 3D printer?
-
Brass nozzles: Every 3 to 6 months for regular PLA and PETG use, sooner if you notice dimensional drift, stringing that cleaning does not fix, or a rough looking extrusion line. If you print several hours daily, plan for 1 to 2 months.
-
Hardened steel nozzles: 6 to 12 months under abrasive use, sometimes longer. They resist wear but can build residue. Clean gently with a nylon brush and purge with a cleaning filament between material changes.
-
High flow systems and Revo style nozzles: Inspect monthly. The integrated assemblies are easy to swap, so it is simple to test with a fresh unit if quality drops.
If you need spares, you will find standard and hardened options under 3d printing nozzles and dedicated 3d printer nozzle replacement listings.
Internal link used: 3d printing nozzles -> https://raven3dtech.com.au/product-category/mellow/nozzles/
What is the best nozzle for 3D printing?
Best depends on your material and goal.
-
For everyday parts in PLA and PETG: Brass 0.4 mm for detail or 0.6 mm for speed and stronger walls.
-
For abrasive filaments: Hardened steel 0.4 mm or 0.6 mm. If your printer supports high flow hot ends, a 0.6 mm hardened high flow nozzle balances speed with acceptable detail.
-
For high temperature polymers: A copper alloy nozzle with a wear resistant coating handles heat transfer well. Pair with the correct hot side hardware and temperature rated socks.
Focus on consistent extrusion, durability for your chosen materials, and easy identification, such as engraved sizes. That combination beats a single blanket choice.
Build plates and bed surfaces that save time
A second build surface saves hours. Swap plates between jobs instead of waiting for cooldown.
-
Smooth PEI spring steel: Great for PLA and TPU. A quick IPA wipe restores grip.
-
Textured PEI: Helps PETG release cleanly and gives a uniform matte finish.
-
Specialty plates: Coated glass or engineering plates have niche benefits. Keep them clean and avoid scraping with metal tools.
Inspect plates weekly for adhesive wear or dents. Replace PEI sheets when glossy patches stop holding a first layer confidently.
Adhesion, tramming, and first layers
A reliable first layer prevents 80 percent of failed prints.
-
Level and tram the bed, then set Z offset using feeler gauges or a single layer test print.
-
Clean the plate with IPA before every session, more often in dusty environments.
-
Add a brim or small raft for tall, slender parts to reduce edge lift.
-
For PETG on smooth PEI, consider a light glue stick barrier to prevent over bonding.
Can you use WD-40 on a 3D printer?
Avoid classic water displacing sprays on rails, lead screws, or bearings. They can strip lubrication and attract dust. Use the right lubricant in tiny amounts. Light oil for smooth rods, lithium or PTFE grease for lead screws, and a suitable rail grease if your linear rails are serviceable. If a bolt needs freeing, apply a small amount of penetrating oil to the fastener only, then clean and relube moving parts after.
Nozzle cleaning tools and techniques
Keep a nozzle cleaning kit on hand. Use cold pulls with nylon or cleaning filament to extract debris. For light build up, warm the hot end to printing temperature and wipe with a nylon brush. Avoid poking hot tips with steel needles, which can scratch bores. If you run fibre filled filaments, schedule a purge after each spool to maintain a clean melt path.
Silicone socks, spare PTFE, and heat control
Silicone socks stabilise nozzle temperature by shielding from part cooling air. This helps your first layer stick and reduces ooze. Replace socks when they harden or tear.
PTFE tubes gradually wear and can deform near the heater. If you notice increased friction, inconsistent retractions, or oval marks, cut back a few millimetres or replace the length. Always make square cuts and seat tubes fully.
Enclosures and Australian summer tips
Warm weather is great for outdoor prints but can push your printer’s electronics and materials. A 3d printer enclosure, even a simple acrylic enclosure, keeps drafts off the print and stabilises temperatures for ABS, ASA, and nylon. In summer, give equal attention to ventilation. Place the enclosure in a well ventilated room, use a window fan or filtered exhaust to move warm air out, and avoid direct sun on the machine. If you print materials with fumes, use a filter system and keep the room fresh with regular air changes. Monitor chamber temps and keep electronics within their rated range.
Safety basics that are easy to forget
-
Heat resistant gloves for hot plate swaps and nozzle changes.
-
Safety glasses when clipping supports and when working near the hot end.
-
A small ABC fire extinguisher nearby, and a smoke alarm in the room.
-
Turn off and unplug before servicing heaters, the 3d printer hot end, or the extruder area. Let components cool fully before touching.
Quick replacement intervals at a glance
-
Nozzles: Brass 3 to 6 months, hardened 6 to 12 months, check sooner under heavy use.
-
Silicone socks: Every 3 to 6 months or when torn.
-
PTFE tube: 6 to 12 months, or at first sign of heat damage or friction.
-
Lubrication: Light oil on rods monthly, lead screw grease every 3 months, rails as per manufacturer guidance.
-
Build plates: Replace PEI when adhesion drops and cleaning does not restore grip.
Where to start
If you are setting up a new fdm 3d printer or refreshing your bench, build your kit with calipers, feeler gauges, brushes, a nozzle cleaning kit, spare nozzles in brass and hardened, silicone socks, PTFE tube, and the right lubricants. Add a second PEI or textured plate for fast turnaround and consistent first layers. Keep your space ventilated, especially through Australia’s warmer months, and you will see fewer failed prints and better surfaces.
You can explore our curated categories for nozzles, plates, tools, and maintenance bundles, backed by secure checkout and local support from our Sydney team. When you are ready, reach out for advice and we will help you dial in a kit that matches your materials and print volume.
Summary of questions answered:
- Tools for 3D printer maintenance: calipers, feeler gauges, hex drivers, brushes, cutters, nozzle cleaning tools, PTFE cutter, cloths and IPA.
- Consumables: nozzles, silicone socks, PTFE tubes, bed adhesives, lubricants, cleaning supplies, and spare build plates.
- Nozzle replacement frequency: brass 3 to 6 months, hardened 6 to 12 months, inspect and replace based on quality.
- WD 40 usage: not recommended on motion parts, use appropriate oils and greases.
- Best nozzle: brass for standard materials, hardened for abrasives, size choice based on detail vs speed.
Internal links used in this article:
- 3d printer tools: https://raven3dtech.com.au/3d-printer-accessories
- 3d printer maintenance kit: https://raven3dtech.com.au/3d-printer-maintenance-repair
- 3d printing nozzles: https://raven3dtech.com.au/product-category/mellow/nozzles/
