Table of Contents
Mastering Klipper Firmware: A Comprehensive Guide to Setup and Optimization
High‑speed FDM printing sounds great on paper, but in real workshops it often feels harder than it should be (and most people have seen this firsthand). Once you push the speeds higher, parts can start showing ringing, weak layer bonding, or missed steps that stop a print halfway through. For industrial engineers and advanced users, that gets frustrating fast. The hardware promises a lot, but the output doesn’t always match the spec sheet. The gap between expectations and reality is usually where things fall apart.
This is where Klipper firmware often makes a real difference, at least from this perspective. Instead of putting all the work on a small controller board, Klipper splits the workload in a smarter way. Heavy calculations run on a host computer, usually a Raspberry Pi, while the printer’s controller sticks to accurate motion. That split matters more than it first seems. Higher speeds become usable, and print quality usually stays steady instead of breaking down. Fewer compromises. More control you can actually use.
In Australia, where manufacturers need fast turnaround for jigs and prototype tooling, this difference stands out. Downtime costs money, and slow iteration wears teams down over time. Klipper has also moved well past hobby use. It’s now common in production‑grade FDM systems, including CoreXY and IDEX machines, running daily on factory floors.
This guide covers setup, tuning, and real‑world optimization without guesswork. It explains how Klipper works, why it often beats traditional firmware, and how to apply it for reliable printer optimization, clear steps that lead to results you can measure.
Why Klipper Firmware Is Different
Traditional firmware like Marlin runs everything directly on the printer’s control board. For a long time, that was usually enough, since printers were smaller, slower, and easier to manage. As machines became faster and more complex, problems started to show up. Step rates would hit limits, motion planning had to be simplified, and print quality could suffer. Each issue on its own might seem minor, but together they often showed up clearly on finished parts. Anyone who has tried pushing print speeds has probably noticed this.
Klipper firmware takes a different approach, and that change matters. Instead of handling everything in one place, the work is split. A host computer takes care of motion planning and other math-heavy tasks, while the controller board focuses on accurate timing, where even tiny mistakes can cause issues. This setup lets each part do what it’s best at, easing the load on the board and creating extra breathing room as speeds go up.
To see how big the difference can be, the numbers help. Older 8-bit boards usually top out around 175,000 steps per second. Even with modern 32-bit boards, real limits still appear once all parts of the firmware are fighting for the same resources.
| Controller Type | Max Step Rate | Typical Use |
|---|---|---|
| 8-bit controller | ~175,000 steps/sec | Legacy FDM printers |
| 32-bit controller | 500,000, 600,000 steps/sec | Modern high-speed printers |
| Klipper with host CPU | Host-dependent | Industrial and CoreXY systems |
By moving planning work to the host CPU, Klipper removes a major bottleneck. That’s why print speeds around 300 to 500 mm/s often become realistic, depending on the hardware. Just as important, surface quality usually stays steady instead of breaking down at higher speeds. For me, that consistency is the real win.
Klipper is a 3D printing firmware that helps you to achieve high 3D printing speeds without losing print quality.
In production settings, this balance often makes a noticeable difference. Speed alone doesn’t help much if parts drift out of tolerance or lose strength. When dimensions stay consistent and layer bonding holds up, print runs become more predictable, which makes it easier to trust printers day after day.
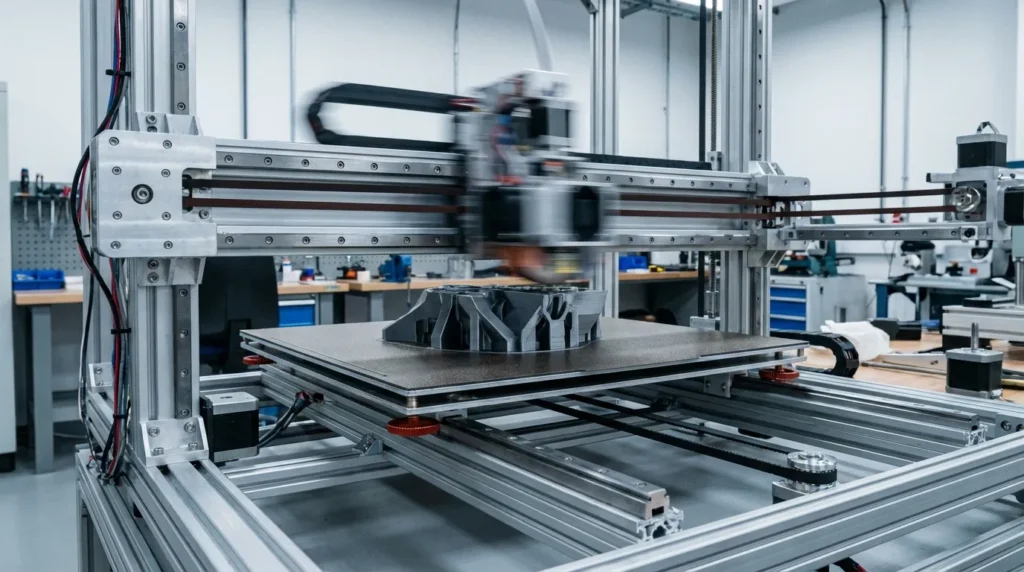
Preparing Your Hardware and System
Many early Klipper issues come down to prep work. It’s not exciting, but it really matters. When this part gets rushed, problems usually show up later in ways that are hard to track down. Taking time to look at the printer hardware first can save hours of troubleshooting. Klipper works best on machines with a stiff frame, smooth linear motion, steady power, and electronics that act the same way every time. Nothing fancy here. These are just the basics.
CoreXY machines, including RatRig V-Core systems, are often a great fit. Their motion systems respond well to better planning, especially at higher speeds, which is usually the goal. IDEX printers can also gain a lot, especially in mirrored or duplication modes used for production work. That’s often where Klipper’s strengths are easiest to see.
Next is picking the host system. A Raspberry Pi is a common choice and works well for most people. Some industrial setups use small PCs mounted in control cabinets that run for months without any attention. Speed isn’t the focus. The host just needs to stay online and avoid freezes or random reboots.
The basic setup usually looks like this:
- Install a supported Linux system on the host
- Set up Klipper with Moonraker and a web interface like Mainsail or Fluidd
- Flash the Klipper firmware onto the printer control board
- Create a base printer configuration file to connect everything
Most changes don’t need reflashing. Editing a text file and restarting the service is usually enough. For engineers, this can feel more like CNC work than typical consumer 3D printing, which many people prefer.
During setup, pay close attention to endstops, motor directions, motion limits, and safety checks. Rushing here often leads to crashes and a lot of frustration when you’re just trying to get a clean first print.
Core Features That Drive 3D Printer Optimization
Klipper firmware includes tools that directly support 3D printer optimization, and for industrial users, two features usually stand out: input shaping and pressure advance. These tend to matter most when machines are pushed to run faster and longer, which is common in production environments. At higher speeds, real-world behavior reaches its limits quickly, and issues show up much sooner than a spec sheet might suggest.
Input shaping focuses on vibration control. As acceleration increases, frames flex and belts resonate in ways most operators can hear right away. That movement often turns into visible ringing on printed parts. By measuring those vibrations and compensating during motion, input shaping helps keep the printer steadier. The result is usually less shaking, fewer surface ripples, and cleaner-looking parts.
Pressure advance focuses on extrusion pressure. Quick speed changes mean molten plastic can lag behind the motion system. This often shows up as blobs at corners or small gaps at line starts, especially on sharp turns. Pressure advance adjusts timing so material flow stays more consistent, leading to more even line width and cleaner edges.
According to engineering analysts at 3D Printernational, these features place Klipper among the preferred firmware choices for modern high-speed and production-grade FDM systems. Today, many users see them as basic expectations for quality output, not optional extras.
| Feature | Problem Solved | Production Benefit |
|---|---|---|
| Input shaping | Ringing and vibration | Cleaner surfaces at speed |
| Pressure advance | Inconsistent extrusion | Sharper corners and seams |
| Live config edits | Downtime during tuning | Faster calibration cycles |
A common issue is turning these features on without proper measurement. Guessing values can make prints worse, which is frustrating. Klipper’s built-in tools and test prints allow measurements first, followed by informed adjustments once real data is available, an approach that usually pays off over time.
Real-World Use in Industrial and Educational Settings
In industrial workshops, Klipper firmware often helps teams move faster, sometimes more than expected. Tooling fixtures that once took overnight can finish in just a few hours (which is a big change). That speed gain matters because it usually shortens feedback loops and removes bottlenecks that slow work, especially during setup or small-batch runs.
Technical educators see a different but related benefit. While a print is running, students can see how acceleration, jerk, and resonance change in real time (not just after something fails). This view often makes motion systems easier to understand, instead of just pressing print and hoping for the best. That hands-on view helps when learning why settings behave the way they do.
Take a small Australian manufacturer making jigs for assembly lines. After switching to Klipper on a CoreXY printer, print time drops by about 40 percent. Dimensional accuracy stays on target, which often lowers cost per part.
There are pitfalls to watch for, though. Common errors include:
- Pushing speed without tuning cooling or respecting hotend thermal limits
- Using unstable power supplies that cause strange failures
Klipper makes these problems easier to see. Logs and graphs show where trouble starts, often right when settings drift, which helps teams treat the printer more like a machine tool and less like a mystery box.
Advanced Considerations for Continuous Printing
The first thing most people notice is heat. In production-grade setups, high-speed printing creates more heat than usual, and it can build up fast. In real use, this means electronics and motion hardware near the hotend need steady airflow to stay reliable, especially when running at speed. When this is ignored, parts tend to wear out much earlier than expected.
Enclosures work well for keeping materials like ABS and nylon stable, which often improves print quality. The downside is hotter air inside the machine, so temperatures still need close attention to keep electronics within safe limits.
Klipper supports remote monitoring and connects to print management systems. This works with Industry 4.0 workflows and lets engineers check jobs, pause prints, and review logs from another room.
As the desktop 3D printing market moves toward USD 7.51 billion in 2026, FDM keeps a large share. High-speed firmware supports this growth by boosting throughput without major capital investment, simple math, really.
Implementing Klipper with Confidence
I usually see Klipper work best when you treat it as a full system upgrade, not just an install. Pair it with solid mechanics and decent parts, then back that up with careful calibration, the boring but important bit, which often matters more.
What happens if you slow down first? You’ll find that checking motion early saves time later. One approach is tuning features one by one and, for teams, using standard PLA and ABS profiles.
Klipper rewards careful work. Once it’s dialed in, it often delivers strong results, like smoother motion when printing ABS.
Putting Speed and Precision to Work
Klipper firmware is no longer an experiment. It’s now a proven option for high-speed, high-precision FDM printing, and real shops are already using it. One of the biggest changes is how it separates heavy computation from real-time motion control. This often removes old firmware limits. As a result, printers can usually run faster without losing accuracy.
For industrial engineers, educators, and advanced users, the benefits tend to show up fast. Prototypes often finish sooner, surface quality usually looks cleaner, and machines act more predictably day to day. That means fewer surprises and less time spent guessing what went wrong.
What really makes the difference is the approach. Better results come from prepared hardware, a clear setup process, and tuning based on real measurements instead of vibes. That’s when Klipper becomes a reliable base, like dialing in one printer in a classroom and then using those same lessons across the room.
