Table of Contents
Klipper Firmware for IDEX Printers: Setup and Optimization Guide
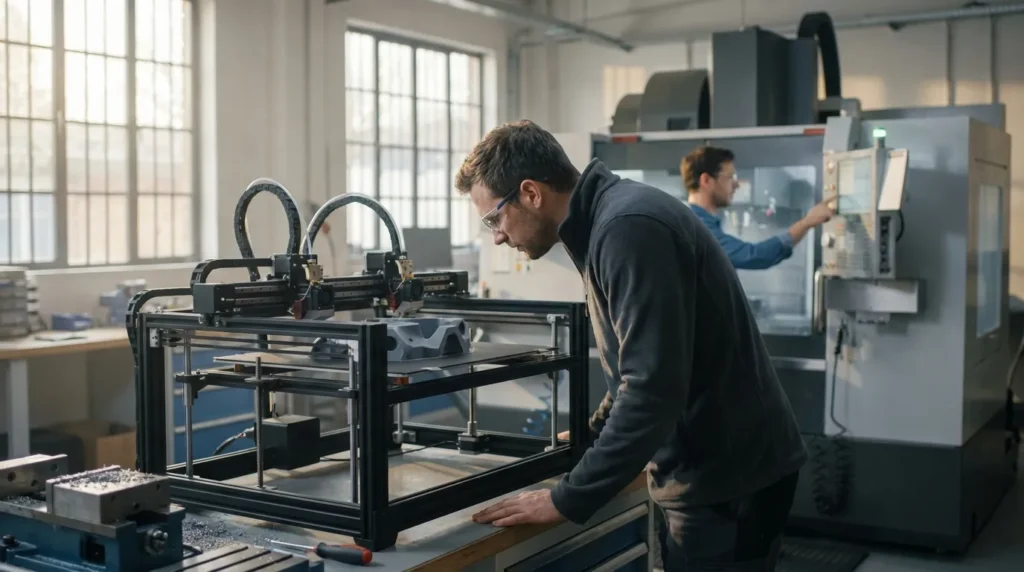
If you run an IDEX printer using Klipper firmware, you already know the benefits can be pretty clear. Two independent toolheads can speed up batch jobs and handle multi-material prints, which is genuinely useful. They can also reduce waste compared with some single-nozzle setups. Still, the trade-off is just as clear. IDEX machines usually need more tuning. If the motion system, offsets, extrusion, or tool changes are not set up properly, that extra speed can turn into scrap very quickly.
That is where Klipper firmware is especially useful. It gives you much deeper control over motion, macros, tuning, and dual-carriage behaviour, not just the basics. For industrial engineers, manufacturing teams, educators, and serious makers in Australia, that often makes a real difference. Better tuning usually leads to more repeatable prototypes, cleaner tooling, and more reliable short-run production.
This guide explains how to set up Klipper on an IDEX printer and improve performance without giving up safety. It covers dual-carriage modes, calibration basics, pressure advance, input shaping, thermal control, and the common mistakes that can hurt output quality. It also looks at practical IDEX 3D printer optimization steps that fit real production environments, such as workshop production lines or small manufacturing runs, rather than only a test bench setup.
Why Klipper Firmware Makes Sense for IDEX Workflows
IDEX printing involves more than just adding a second hotend. Two moving systems need to stay aligned, predictable, and safe through the whole job. Klipper makes that easier by moving complex motion planning to a more capable processor. It also gives flexible control through macros, tuning tools, and detailed configuration files, which helps a lot in real use. That becomes even more useful when both toolheads need to keep working properly across longer or faster prints.
This matters even more now that high-speed FDM is becoming a bigger part of real manufacturing. MarketsandMarkets values the global 3D printing market at USD 16.16 billion in 2025 and projects USD 35.79 billion by 2030, with a 17.2% CAGR. At the same time, industrial printer market estimates reach USD 20.8 billion in 2026. For production teams, that usually means more pressure to get higher throughput from each machine instead of just buying more equipment, which is often the more expensive choice.
| Metric | Value | Period |
|---|---|---|
| Global 3D printing market | USD 16.16B | 2025 |
| Global market forecast | USD 35.79B | 2030 |
| Global market CAGR | 17.2% | 2025-2030 |
| Industrial 3D printer market | USD 20.8B | 2026 |
For IDEX users, Klipper also supports dual-carriage modes like PRIMARY, COPY, and MIRROR. That makes duplicate-part printing possible, and it also supports left-right mirrored production for fixtures, covers, brackets, and paired components, which is useful for many common jobs.
I’ve put together a branch with more extended IDEX support, namely COPY and MIRROR modes are supported for the dual carriage.
That is one reason advanced platforms from providers such as Raven 3D Tech appeal to users who need both speed and precision.
Building a Safe Klipper Firmware Setup for Dual Carriages
A fast setup is nice, but on a dual-carriage machine, a safe setup usually matters more. Before you push higher acceleration, start with the parts that help stop crashes and bad offsets.
First, make sure each carriage homes correctly and parks in a known spot, the same spot every time. Then check X and Y travel limits for both toolheads. On an IDEX machine, even one bad limit can cause carriage overlap or a bed strike during tool changes, usually when one toolhead moves out of the way and the other takes over. That is not good. After that, set nozzle offsets carefully. If toolhead 1 and toolhead 2 do not line up, duplicate or mirror prints can fail, even when single-tool prints still look fine.
So work through setup in this order:
Mechanical and motion basics
- Belt tension on the motion systems is easy to check, and it usually matters more than people expect.
- Confirm the gantry is square, since small alignment issues often cause bigger problems.
- Make sure the hotends are at the correct Z height.
- Are the endstops set right? Also check the homing direction, because that is definitely not something to have backward.
- Test the parking positions with the bed at a safe height, probably a little above the nozzle.
Toolhead alignment
- Calibrate the X and Y nozzle offsets.
- Make sure both nozzles are at a similar Z position, really very close.
- A simple two-colour alignment print or two-tool test usually helps here.
- Save only one change at a time, so tracing errors is much easier.
Tool change behaviour
- Add wipe routines, and prime if needed
- Parking macros often help reduce ooze over the part
- Set standby temperatures when the material allows it
- In some setups, it’s better to keep this a bit more cautious
One major caution needs extra attention: in some dual-carriage cases, bed mesh can create unsafe behaviour, and that should be taken seriously.
Activating bed mesh in this case will make both carriages follow the bed mesh for carriage_0, which may result in a crash of carriage_1 with the bed.
For production users, this matters a lot. If COPY or MIRROR modes are part of the plan, test the first-layer strategy very carefully. In some cases, a flatter bed and stricter mechanical tramming are the safer choice. A conservative first layer can also help, instead of relying on mesh behaviour tuned for only one carriage.
Tuning Motion and Extrusion for Better Print Quality with Klipper Firmware
Once the machine is safe, the next step is dialing in performance. A lot of users mix up two different tools here: input shaping and pressure advance. That confusion is common because they fix different issues.
Input shaping helps cut down ringing and ghosting caused by vibration. Pressure advance handles extrusion timing as the printer speeds up or slows down. It’s pretty simple in this case. One is connected to motion resonance, while the other is about how material moves through the nozzle, so they should usually be tuned as separate settings.
The Klipper documentation explains it clearly:
pressure advance does two useful things, it reduces ooze during non-extrude moves and it reduces blobbing during cornering.
With IDEX systems, each toolhead should be tuned like its own printer. Different hotends, filament paths, nozzle types, and cooling conditions can all change the result. Because of that, it usually doesn’t make sense to expect both extruders to use the same pressure advance value. In many setups, they won’t.
Klipper says that typical pressure advance values are between 0.050 and 1.000. It also recommends a 100 mm/s test speed and a test layer height around 75% of nozzle diameter. A common tuning tower factor example is 0.020.
| Tuning item | Recommended starting point | Why it matters |
|---|---|---|
| Pressure advance range | 0.050 to 1.000 | Controls ooze and corner quality |
| Pressure advance test speed | 100 mm/s | Makes flow timing issues easier to see |
| Layer height for test | About 75% of nozzle diameter | Improves readability of results |
| Example tower factor | 0.020 | Useful for structured test setup |
Klipper also includes a simple formula for calculating the final number from a tuning tower, which is really useful here.
The pressure_advance value can then be calculated as `pressure_advance =+ * `.
In practice, the workflow is straightforward:
Per-tool tuning process
- Start by setting e-steps or rotation distance correctly.
- Set nozzle temperature for the actual production material, not just some random test spool.
- Tune pressure advance for toolhead 1, then do the same for toolhead 2, because both usually affect the final result.
- Run input shaping only after the mechanical setup is completely finished.
- Check surface finish again at real print speeds, not just during slow tests.
This step matters a lot in industrial work. Copy jobs often make defects easier to notice, so if one nozzle leaves small corner blobs, you usually end up with two flawed parts instead of one. That is often when problems become obvious.
Real IDEX Gains in Prototyping and Production
A well-tuned IDEX printer can do more than just print two colours, which is nice. In workshops and engineering teams, the real value usually shows in a few practical uses. That’s where it starts to feel like real-world work.
Duplicate part production
COPY mode works well for short runs of matching parts. If you print clips, brackets, cable guides, or jigs in pairs, you can likely increase output without adding another machine, which is nice. It usually helps most when machine count is limited and demand remains steady.
Mirrored parts
MIRROR mode works really well for left-right parts like enclosures, mounts, handles, and machine guards that come in pairs, which is very handy. Instead of making two separate setups, one print can often make a matching pair and save time.
Support-material workflows
With the right setup, one toolhead can print the main polymer while the other handles support material. That can really help on tricky shapes, especially around overhangs and internal features, which is often where things get frustrating. It also helps when post-processing time matters during cleanup or support removal.
The broader market trend is moving toward faster, more production-ready FDM. One industry source said that modern motion systems now reach very high acceleration and speed targets in current architectures. That sounds impressive, at least on paper.
By reducing the inertial mass of moving components, this architecture achieves extreme acceleration (commonly exceeding 20,000 mm/s²) and print speeds (600, 1000 mm/s).
Of course, most real parts should not be printed at those big headline speed numbers. Usually, the better goal is stable, repeatable output. Common mistakes include trying COPY mode before nozzle offsets are checked, using one pressure advance value for both tools, ignoring standby temperature control, and pushing aggressive acceleration before checking frame resonance. These issues waste time and can be frustrating. They often look like material problems, but in most cases they come from setup.
Thermal Stability and Repeatability Across Both Hotends
Thermal control is often the part people miss in IDEX 3D printer optimization. Even if motion is set up well, two hotends that act differently can still give you uneven walls, bridges, and seams.
A good place to begin is with how both tools heat up. They should warm at a similar speed and keep temperature steady with only small changes. Cooling needs the same level of attention, because it often affects print quality more than many people expect. If one side has stronger airflow, overhangs can turn out differently from the left toolhead to the right one.
Some practical habits help here:
- Match nozzle size and hotend type unless the job really needs a different setup
- Tune PID and flow for each hotend, and use standby temperatures during idle periods to reduce ooze
- Keep filament dry, especially nylon, PETG, and support materials
- Monitor chamber and ambient temperature during long print runs
For schools, labs, and factory floors, it helps to write down these settings. In most cases, a repeatable machine is easier to teach, simpler to pass between operators, and easier to scale across a printer fleet when consistent results matter.
Smart Workflow Tips for Long-Term Klipper Firmware Performance
A good firmware setup is only one part of the picture. Good long-term Klipper results usually come from steady workflow habits: clear profiles, version-controlled configuration, and test methods the whole team can repeat without guessing, which honestly saves a lot of hassle.
Create separate print profiles for:
- Single-tool production
- COPY mode batch work
- MIRROR mode paired parts
- Dual-material support jobs
Clear macro names help, and a change log in your config notes helps just as much. If acceleration, pressure advance, parking routines, or even a small setting gets adjusted, write down why at the time. That often makes it a lot easier to trace quality changes weeks later, or after the next service visit.
It also helps to define acceptance checks. For example, inspect first-layer width, offset alignment, seam quality, and duplicate-part consistency whenever a machine has been serviced. It is simple, but still useful, because it gives tuning a repeatable structure instead of leaving too much to guesswork.
The economics point the same way. Industry commentary suggests that faster printing and lower material costs are making end-use part production more practical. So firmware tuning is not just a hobby exercise anymore. In this view, it has become part of manufacturing efficiency, especially when consistent output over time is the goal.
Put Klipper IDEX Tuning Into Practice
The best Klipper setup for an IDEX printer usually isn’t the one behind the fastest speed screenshot. It’s the one that gives you safe motion, clean extrusion, stable temperature, and repeatable output over time. For engineers and advanced users, that usually starts with the basics: carriage limits, nozzle offsets, homing logic, and safe tool changes, even if that part feels a bit boring. From there, pressure advance and input shaping need to be tuned for each toolhead, and it helps to check COPY and MIRROR modes with real production parts so their behavior shows up in real use.
A few points are worth keeping in mind. Klipper supports PRIMARY, COPY, and MIRROR, and each mode has its own tuning needs, which is often where setup differences show up. Pressure advance and input shaping deal with different issues, so they should be handled separately. On some dual-carriage setups, bed mesh needs more attention. Per-tool calibration also matters if real IDEX performance is the goal, especially when the two toolheads do not behave exactly the same.
For Australian users working in prototyping, tooling, education, or production-grade FDM, this kind of method can often improve throughput without giving up precision. Start small, document each change, and test with the same discipline used in manufacturing, because that usually saves time later. That is how Klipper firmware becomes a dependable part of a printing workflow.
