Table of Contents
Essential Guide to FDM 3D Printer Setup and Optimization
Getting an industrial-grade FDM 3D printer to run at its best isn’t just a matter of turning it on and hitting ‘print’, though that would be amazing. For engineers, manufacturing pros, tech teachers, or passionate hobbyists in Australia, it’s usually the careful FDM 3D printer setup and small adjustments that unlock the speed, accuracy, and reliability you’re after.
This guide keeps things simple, moving step-by-step from key calibration through to fine tweaks that keep results steady, even on your 50th identical part. You’ll see important FDM 3D printer setup habits, smart ways to improve performance, and how these methods match Australia’s growing advanced manufacturing scene, which is exciting to see develop.
The two most significant technology trends right now are Cold Metal Fusion and Multi-Material Metal 3D printing. It’s way easier to do a Direct to Consumer company now than at any point in history, and the capex to get off the ground for a manufactured good is coming significantly down due to the quality of 3D printing coming way up.
Laying the Groundwork: Preparing Your FDM 3D Printer Setup
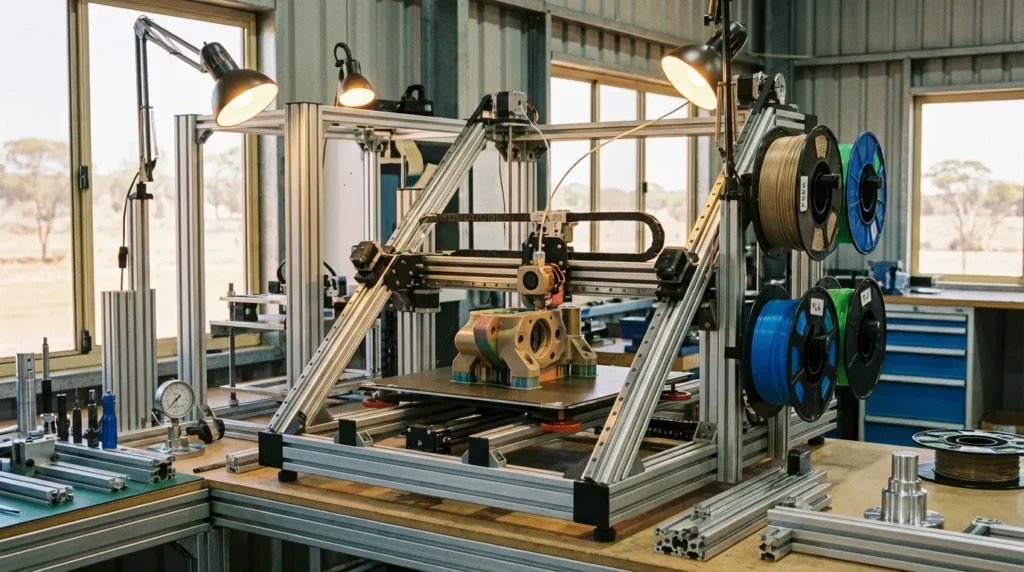
Before you hit print, it’s worth taking a moment to give the machine a good check. Industrial FDM setups like the RatRig V-Core models usually repay that extra attention with cleaner results and fewer mid-print headaches.
- Mechanical Integrity: Look closely at belts, rails, and lead screws, anything that moves. Even a tiny wobble or a slightly loose belt can show up as a crooked layer, and it’s annoying to spot it halfway through a big job.
- Bed Leveling: On large-format printers, mesh-based auto-leveling helps keep layer heights even across the whole bed. If one corner is just a bit low, it can ruin an otherwise perfect part.
- Environmental Control: Keep temperature steady, avoid drafts, and watch humidity. Moisture in filament can make it swell enough to mess with tolerances, especially on precise parts.
- Firmware & Fasteners: Update firmware if it’s old, and give bolts a quick tighten, loose ones can cause small vibrations that mess up the finish.
If the Z-axis lead screw isn’t dialed in, tall prints might show unwanted horizontal shifts. In industrial settings, climate control often makes the difference in keeping tolerances sharp. A sudden cold breeze or humid day can change how filament flows. Many shops solve this with a climate-controlled enclosure, it can turn average prints into smooth, accurate ones. With the Wohlers Report 2025 putting the additive manufacturing market at USD 21.9 billion and polymer-based FDM still leading in tooling and prototyping, getting your FDM 3D printer setup right is a smart way to keep results consistent. For more enclosure tips, see 3D Printer Enclosure Setup for High-Speed FDM Printing.
| Step | Purpose | Recommended Tool |
|---|---|---|
| Belt Tensioning | Prevent layer shifts | Tension gauge |
| Rail Alignment | Ensure smooth motion | Dial indicator |
| Bed Leveling | Maintain first layer adhesion | Auto-leveling sensor |
Dialing in Precision: FDM 3D Printer Setup Calibration Techniques
Calibration isn’t just hitting ‘auto-calibrate’ and calling it done. If you want clean, industrial-level prints, it’s worth slowing down to make sure the fundamentals are set up right.
- Nozzle Offset: Adjust the Z-offset so the first layer sticks firmly to the bed, but doesn’t get squished into a glossy smear.
- Extrusion Multiplier: Checking real filament flow can stop those annoying blobs from over-extrusion (a common frustration).
- Temperature Settings: A good starting point is the filament maker’s datasheet, then tweak for your own shop, things like drafts, humidity, or seasonal temperature changes can matter more than you’d think.
- Bed Leveling: A truly level bed makes each layer stack neatly onto the last.
Once the basics are solid, advanced tuning becomes worth it. Linear advance smooths out extrusion pressure, while backlash correction fixes slight mechanical play. For exact flow rates, print small test cubes and measure with calipers, ±0.01 mm accuracy is possible. Dual extrusion setups (like IDEX) work best when both nozzles are aligned so materials stay in their lanes.
Calibration isn’t a one-time job. Even a small change in filament diameter from a new spool can alter results. Some industrial teams log calibration data for months, spotting drift before a precision jig or fixture goes out of spec, especially important when aiming for tolerances under 0.1 mm.
Collaborative, dynamic partnerships are the key to smarter, faster, and more flexible manufacturing.
If you’re new to this, our Ultimate Guide to FDM 3D Printer Calibration Techniques covers both hands-on hardware steps and smart software tweaks, and pairs well with Essential Guide to 3D Printer Calibration: Techniques for Precision and Performance.
Optimizing FDM 3D Printer Setup for Speed Without Losing Quality
Pushing print speeds past 200 mm/s can be exciting, but it’s smart to tweak a few key settings before going full throttle.
- Acceleration & Jerk Settings: Dropping jerk slightly can smooth out those faint “ringing” ripples near corners, most people notice them right away once they know what they are.
- Cooling Strategy: Directed airflow can really help with tricky overhangs, though too much cooling can make layers stubborn about sticking together.
- Material Handling: Nylon and other moisture-loving filaments work best completely dry, sealed tubs with desiccant are an easy step that can prevent major issues.
- Hardware Upgrades: Stronger frames or linear rails keep movements precise and clean when speeds are pushed high.
A lot of makers increase speed gradually, keeping an eye out for signs like ghosting or under-extrusion. A handy upgrade is a high-flow hotend, which can feed more filament without overheating. For tough plastics like PEEK or ULTEM, a heated, enclosed chamber can be worth it, especially for aerospace-grade parts. Keeping internal temperatures steady can cut rejects by about 20%. And here’s a slicer trick: adaptive layer heights, which keep fine details sharp while letting infill print much faster.
<DataTable
headers={[“Parameter”, “Effect”, “Industrial Tip”]}
rows={[“Acceleration”,“Controls start/stop speed”,“Balance speed with stability”],[“Cooling”,“Affects overhang quality”,“Adjust per geometry”],[“Material Drying”,“Prevents brittleness”,“Keep RH under 10%”]]}
caption=“Key optimization parameters for high-speed FDM”
/>
Avoiding Common Pitfalls in FDM 3D Printer Setup for Industrial Printing
Even seasoned operators can run into problems, often just when everything feels like it’s going well:
- Skipping Maintenance: Forgetting a lubrication cycle or missing nozzle checks can stop production much sooner than expected.
- Ignoring Ambient Conditions: If factory doors stay open and temperatures swing, parts can warp or drift out of spec.
- Overloading Print Queues: Stacking too many jobs without time for inspections often ends with a bigger reject pile than anyone wants.
- Neglecting Calibration: Small alignment changes can make precision printing feel like chasing a moving target.
And then there’s slicer profile confusion, different settings across printers can leave a fleet producing uneven results. Poor filament storage lets moisture in, which weakens even strong engineering materials. Large fleets, including swarm setups, can pump out parts fast, but only if process control stays tight. In Australia’s manufacturing hubs, ISO/ASTM TS 52930 sets the standard for part qualification, skip it and the run could be scrap. Catching problems mid-process can save a lot of money and frustration.
Advanced Strategies for Continuous FDM 3D Printer Setup Operation
When production keeps going around the clock, the setup has to be better than just “okay.” That’s when extra controls and planning really start to make a difference.
- Automated Monitoring: Cameras and sensors watch every move of the print head, even the boring ones, so small problems can be spotted before they turn into big ones.
- Predictive Maintenance: Smart tools use data to point out parts showing early wear, letting you swap them out days before they’d actually break.
- Voxel-Level Control: Changing materials at the layer level makes it possible to create builds with different properties in specific areas.
- Environmental Management: Keeping temperature and humidity near the printer’s sweet spot often makes output more consistent.
Running nonstop means keeping spare hotends, belts, and bearings close, no late-night emergencies. Klipper firmware is popular for quicker response and smoother motion; input shaping cuts most high-speed vibration without losing accuracy. Some teams finish prints with CNC passes, trimming surfaces to exact specs. Add auto-removal with conveyors or robotic arms, and the whole workflow runs like a self-sufficient shop, watching it in action is oddly satisfying.
Building Your Success in FDM 3D Printer Setup Printing
By now, most people working with FDM have figured out that setup and fine‑tuning tend to work hand in hand. It’s smart to get the mechanical basics sorted first, tight belts, a frame that’s square, and a well‑leveled bed, before moving on to detailed calibration. Once those parts are solid, it helps to try different speed settings, adjust material profiles, and aim for that sweet spot where prints come out the same every time. That’s usually when the whole process starts feeling easy.
Across Australia, advanced manufacturing teams are using this approach in plenty of different ways. Some are pushing out prototypes for new products faster, others are making custom jigs and tools for everyday tasks, and some are even running small‑batch production. It’s interesting how the same FDM 3D printer setup can work for an aerospace engineer chasing super‑tight tolerances and a teacher helping students with their first hands‑on fabrication project.
The real gains often come from making small adjustments a regular habit, tracking things like print success rate, accuracy of dimensions, scrap amounts, and operator efficiency. These numbers quickly show where things work well and where they don’t. Ongoing training helps teams know how far they can push without risking a failed build. Keep an eye on how prints behave, check your FDM 3D printer setup often, and tweak when results start slipping. That’s how waste drops, jobs finish faster, and parts are ready right off the bed.
Want to keep reliability high? Check out our guide: FDM 3D printer maintenance: Essential Practices for Reliability.
With solid prep and steady adjustments, your FDM 3D printer setup can be a dependable tool, turning out strong, accurate parts day after day.
