Table of Contents
Advanced Calibration Techniques for FDM 3D Printers
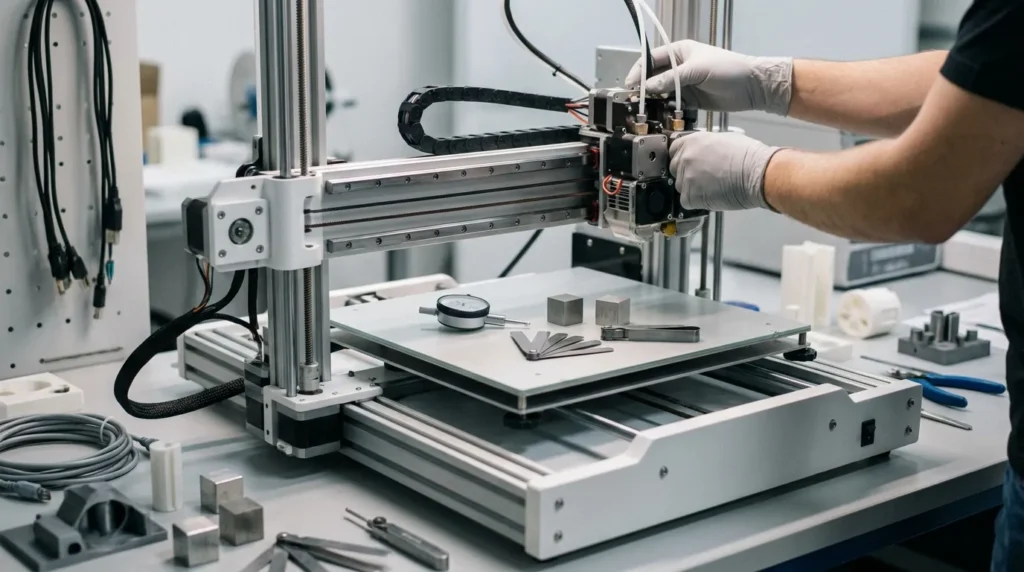
Anyone who runs FDM 3D printers every day usually learns this the hard way: speed and precision don’t come from hardware upgrades alone. They usually come from calibration, the less exciting work that still carries most of the load. Many teams spend on stiffer frames or faster motors, then end up dealing with rough surfaces or drifting tolerances that ruin first layers. Watching a print fail halfway through is frustrating. In practice, the biggest gains from advanced calibration usually start at the print bed, not on a spec sheet.
For industrial engineers and educators in Australia, calibration is no longer easy to brush aside. High‑speed FDM systems now hit motion speeds once limited to CNC machines, which still surprises many users. Without careful tuning, that speed chips away at accuracy, and fast failures stack up quickly. This article explains advanced calibration techniques in clear, practical terms, no fluff and no guesswork piled on.
It looks at how motion tuning, extrusion control, thermal setup, and firmware tools work together in real-world use, not just theory. The focus stays on prototyping, tooling, and short‑run production. The goal is simple: parts that come out right the first time, instead of endless retries and tuning loops that slow everything down.
Why Calibration Matters More Than Hardware Upgrades
Speed has quietly changed the rules. Industrial and prosumer printers now run at about 500 to 600 mm per second, which is a big jump from older desktop machines that often crawled along at 50 to 80 mm per second (many people still remember how slow that felt). At these higher speeds, small setup mistakes rarely stay small. They tend to show up fast as rough surfaces or parts that don’t fit the way they should.
Because of this, accuracy problems often get blamed on the printer itself. That reaction makes sense, and it’s very common. In real use, though, size and fit issues usually come from calibration and settings that have slowly drifted over time. Industry data points to this clearly: a well‑tuned FDM printer can often hit XY accuracy in the ±0.1 to ±0.3 mm range. For most shops, that level of accuracy is already enough for jigs, fixtures, and everyday enclosures without constant reprints.
That’s why structured calibration workflows matter so much, at least from my experience. Instead of guessing, engineers usually follow clear, repeatable steps in a set order. Motion tuning normally comes first. Then material flow and temperature are adjusted together, since they affect each other. Modern firmware tools help a lot here, often cutting manual effort by about 30 percent compared to older methods.
There’s also a cost side that often gets overlooked. Research in additive manufacturing shows that loose, unplanned calibration can push scrap rates up to 15 percent. If you print regularly, dialing in calibration often pays off faster than upgrading motors or electronics.
| Metric | Well-Calibrated Printer | Poorly Calibrated Printer |
|---|---|---|
| Print speed stability | Consistent at high speed | Frequent skips and ringing |
| Dimensional accuracy | ±0.1 to ±0.3 mm | ±0.5 mm or worse |
| First layer success | Repeatable across plate | High scrap rate |
Motion System Calibration for High-Speed Printing
Motion calibration sits at the center of high‑speed printing, and most people agree on that. When a printer can’t move smoothly or repeat the same motion every time, other issues show up fast. Cutting corners here usually causes more trouble later. The process often begins with steps‑per‑millimetre calibration on the X and Y axes, followed closely by the Z axis. This makes sure the movements sent by the firmware match what the machine actually does, not just what it thinks it’s doing.
Next up are acceleration and jerk limits, and this is where careful testing matters. Most printers ship with fairly safe default values, which works fine for everyday printing. Push those settings too hard, though, and ringing, ghosting, and other surface flaws tend to appear. They’re easy to spot once you know what to look for. A practical method here is resonance testing with vibration compensation, which shows how the printer behaves as speeds increase.
Klipper firmware supports input shaping by measuring how the printer vibrates and adjusting motion to reduce it. This is one reason many modern FDM printers can run faster while still producing clean parts.
After motion limits are dialed in, belt tension needs a close look. Uneven tension can slowly throw off dimensions without being obvious. Linear rails should also move freely, without sticking or dragging.
Frame squareness and axis alignment are just as important. Small errors, especially on larger machines, can stack up over long moves.
This level of tuning is common on RatRig V‑Core systems used in industrial environments. Reliable. Proven.
Advanced Extrusion and Flow Calibration Techniques
Once motion is stable, extrusion calibration is usually where accuracy problems start to show up. This step often exposes small issues that were easy to miss earlier. Extruder steps‑per‑millimetre are a good place to start, and they matter more than many people expect. Measuring how much filament actually moves through the system, instead of relying on firmware numbers, helps catch small errors that slowly add up over a full print. These problems often only become obvious when parts no longer fit together.
Flow rate calibration comes next and makes a bigger difference than it first appears. Single‑wall test prints make the results easy to see. Measure the wall thickness with calipers (digital ones are usually easier to use) and adjust flow until it matches the slicer setting. This affects hole sizes, wall accuracy, and how cleanly parts fit during assembly.
High‑speed printing adds another challenge. When print speed changes, pressure inside the nozzle changes too, which can cause rounded corners or thin lines. Linear or pressure advance predicts this behavior and adjusts for it early, helping reduce failed prints.
Filament consistency also matters. Even good filament can vary slightly between spools, and those small changes can affect results. Filament‑specific profiles help keep prints predictable, which is why production setups depend on them.
Temperature tuning should not be skipped. Printing too hot increases stringing and size variation, while printing too cold can lead to under‑extrusion and weak layers. Small changes, around 5 °C, can clearly affect flow at higher speeds, so it’s worth checking more than once.
Bed Leveling and Z-Axis Precision in Production Use
First layers usually decide whether a job succeeds or quietly fails, especially once production runs start and mistakes aren’t easily forgiven. That’s why bed leveling gets more demanding at scale. Manual leveling can still work on small printers and simple setups, where surfaces are easier to handle and errors are often survivable. Industrial machines usually rely on automation because the build area is larger and less forgiving. Mesh bed leveling probes dozens of points across the plate instead of assuming one flat plane. As the print runs, firmware keeps adjusting nozzle height. You don’t really notice it, but it’s doing steady background work the whole time.
Z-offset calibration matters just as much, and it’s often where problems begin. If the nozzle sits slightly too high, parts may not stick, especially on long runs. Too low, and it digs into the surface, leaving rough or warped bottoms. Advanced users often tune Z-offset for each build surface and material, since every combination behaves a bit differently. There aren’t many shortcuts.
Z-axis steps also need regular checks. With typical layer heights around 0.1 to 0.3 mm, even small errors show up fast. When Z values drift, layers stop stacking as expected and issues usually follow.
Skipping recalibration after maintenance or ignoring thermal expansion is a common mistake. Large beds expand when heated, so calibrating cold and printing hot can cause slow but real drift during long jobs.
In high-throughput settings, uneven Z behavior often shows up as uneven first-layer sheen or patchy adhesion across the bed, easy to miss at first glance. That’s why industrial teams log Z settings and re-check them on a schedule, especially after service or hardware changes. Routine work, but still key.
Firmware, Automation, and the Future of Calibration
Automation is likely the most noticeable shift right now. Auto Z calibration, adaptive mesh leveling, and built‑in self‑tests have cut manual calibration work by about 30 percent over recent years. That difference is easy to see, especially for teams that once depended on late‑night rechecks and a lot of careful guesswork.
Firmware has changed how engineers think about calibration, at least from my point of view. Tools like Klipper move the process toward tuning based on real measurements. Instead of adjusting by feel, engineers look at what’s actually happening and react to that. It usually means less luck, more data, and improvements that show up early.
Calibration frameworks are getting more focus too. Settings and workflows are written down in much more detail than before, sometimes almost too much, but results are easier to repeat. This is especially useful in education settings, where shared machines and rotating students can otherwise cause surprises.
Cloud‑connected firmware and remote monitoring add another layer. Teams can compare calibration data, watch drift over time, and keep output consistent across printer fleets. For Australian manufacturers, this supports local production and shorter lead times, like keeping several machines matched on the same part run without constant manual checks.
Putting Calibration Into Daily Practice
Advanced calibration works best when it becomes a routine, not a one-time chore. I’ve found that a simple checklist really helps, especially when people actually use it, which is usually the tricky part. Starting with motion checks, then extrusion, and then moving on to bed and thermal settings keeps things steadier. Following the same order each time helps avoid skipped steps and the small mistakes that slowly pile up.
The most useful part is working with test parts that match real jobs. Showpieces may look good, but they can be misleading. A better approach is tuning for the materials used every day instead of setting things once for basic PLA. Filament storage matters here too, since moisture can throw off results before anyone catches it.
Tracking changes also matters. Every firmware update or hardware tweak should be written down. From what I’ve seen, teams with clear logs fix problems faster and deal with fewer surprises during production runs. Clear ownership helps, since one source of truth keeps settings steady across shifts. Companies like Raven 3D Tech focus on integration and tuning because hardware by itself rarely tells the whole story in day-to-day production.
The Bottom Line for High-Precision FDM Printing
What usually makes the biggest difference isn’t speed by itself, but control. Advanced 3D printer calibration separates fast prints from parts you can actually use. Motion tuning lets you push speed without losing control, which is often the hard part. Extrusion calibration stays focused on accuracy in the printed part, and that’s usually where issues show up first. Bed leveling keeps first layers consistent and saves a lot of frustration, you’ve probably felt that before. Firmware sits under everything, keeping all these pieces working together.
For engineers and educators, calibration is a skill worth learning, and advanced users tend to see the same payoff. It saves time and cuts waste, which helps build trust in machines over time. You don’t need perfect hardware to get there, controlled behavior matters more, and nothing fancy is required.
In competitive manufacturing, that level of control often leads to higher yield and tighter tolerances, making delivery schedules easier to plan. That usually matters more than small gains from new hardware in day-to-day work. Looking for production-grade FDM output? It starts with calibration, then documenting it, repeating it, and making it better, like getting that first layer right, every time.
