Table of Contents
Klipper Firmware: Unlocking the Full Potential of Your 3D Printer
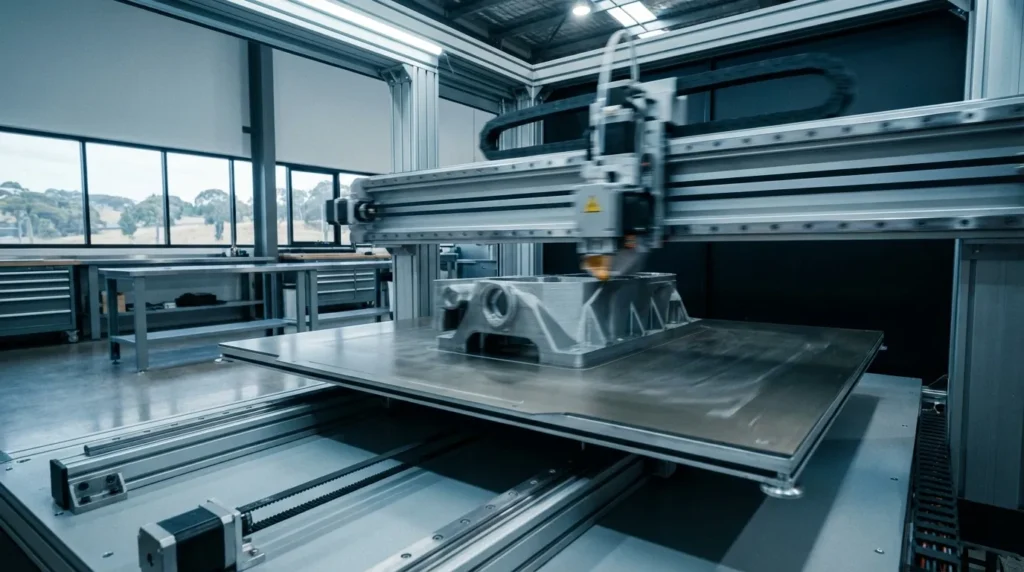
If you work with FDM 3D printers every day, the issue usually shows up quickly. You want higher speeds and a cleaner surface finish, with tolerances that actually hold up in real‑world use, not just in a slicer preview. On longer prints or complex shapes, traditional firmware often becomes a quiet bottleneck, slowing things down more than most people expect. Klipper firmware solves this by rethinking how printer control works right from the start.
What makes this interesting is how Klipper firmware handles that limit. In practice, it makes a clear difference. Instead of asking the printer’s mainboard to do everything, Klipper splits the workload in a way that feels obvious once you see it run. Motion planning happens on a more powerful computer, while the printer board focuses on accurate, step‑by‑step moves. The results tend to show up fast: quicker prints, smoother motion, and control that feels more predictable during long or demanding jobs, especially multi‑hour runs.
For Australian engineers, educators, and advanced users who spend serious time tuning machines, this often matters more than raw speed alone. Faster prototyping shortens development cycles, and reliable precision leads to functional parts, not just good‑looking demos that fail under load. Klipper is now widely used in industrial 3D printing, production tooling, and advanced education labs where consistency really counts.
This guide explains how Klipper works and why it supports serious 3D printer optimization. No fluff, at least in our view. It also covers what it takes to use it well, including performance data, setup basics, common mistakes, and future trends, so you know what you’re getting into before committing time or hardware.
Why Klipper Firmware Delivers Real Performance Gains
Klipper firmware feels different mainly because of how it’s designed, and that design choice makes a real difference in day‑to‑day use. Traditional firmware runs everything on the printer’s controller board, which can become a limit once speeds go up. As motion calculations stack up, accuracy can start to drop. Klipper handles this differently by sending the heavy math to a separate host computer, usually a small single‑board system that can handle the load much more easily. That split is a smart move, and it’s often why Klipper feels smoother during regular printing.
Because of this setup, a common bottleneck goes away. The controller no longer has to do everything at the same time, which leads to steadier behavior when the printer is pushed harder. Research shows that moving calculations off the controller increases available computing power in FDM systems and allows more advanced motion control. With extra headroom, motion calculations can run at higher rates. Timing stays stable instead of drifting or skipping steps as speeds increase. No surprises, just consistent results.
Klipper, an open-source firmware for 3D printers, integrates processors from single-board computers with printer mainboards, thus expanding the computational capacity of additive manufacturing systems.
So what does this look like during a real print? You get higher step rates, quicker acceleration, and smoother corners, especially when changing direction fast. Klipper can handle complex motion planning that older firmware often struggles with. This is easiest to see on CoreXY and high‑speed Cartesian printers, where tight coordination really matters.
| Performance Metric | Typical Range | Industrial Impact |
|---|---|---|
| Maximum step rate (32-bit) | 500,000, 600,000 steps/sec | Supports high-speed motion |
| Print speed | 300, 500 mm/s | Shorter production cycles |
| Acceleration | 3,000, 7,000 mm/s² | Sharper corners, less ringing |
| 3DBenchy time | 15, 20 minutes | Rapid benchmarking |
How Klipper Firmware Improves Precision at High Speed
Speed on its own doesn’t mean much if print quality starts to fall apart. Klipper firmware focuses heavily on precision, especially when printers are pushed to move faster. That balance is the real benefit: higher speed without losing accuracy. Two features usually get attention early, Input Shaping and Pressure Advance, and there’s a clear reason why. Both help keep parts clean and accurate, even at the faster speeds many users want to reach.
The most obvious changes often come from Input Shaping. It cuts down vibration by examining how a printer’s frame reacts during quick movements, then adjusting motion before ringing shows up. This matters most for tall prints, thin walls, and long straight edges, where issues usually appear first. At high speeds, even small vibrations can affect dimensions and surface finish.
Pressure Advance handles a different problem: how filament pressure behaves inside the hot end. Without good tuning, corners can bulge and lines become uneven as speed goes up. Once it’s tuned properly, extrusion stays steady through fast direction changes. This holds true for PLA, PETG, and tougher engineering nylons used for functional parts.
Dr. Ivan Petrov explains why this matters in professional settings.
By offloading computationally intensive tasks to an external single-board computer, Klipper enhances speed, precision, and flexibility while reducing prototyping time.
In real workshops, the benefits show up quickly. Jigs fit as expected, fixtures stay aligned, and tooling holds up during longer production runs where small errors usually appear. Dimensional repeatability improves, and teams often see less post-processing and rework over time.
Setup and Configuration: What Professionals Need to Know About Klipper Firmware
Klipper setup doesn’t work like traditional firmware, and that difference is usually the first thing people notice. Instead of compiled code, all configuration lives in text files. That can sound like a small change at first, and on paper it often does. In everyday use, though, it clearly changes how operators work with machines, especially when managing more than one printer.
What stands out is how fast changes can be made. Acceleration, motor currents, or probe offsets can be adjusted without reflashing firmware, which makes a real difference in practice. In production settings where downtime costs money, such as commissioning or planned maintenance, this flexibility often shortens optimisation cycles. Feedback comes sooner, prints don’t need to finish just to test a change, and less time is spent waiting.
A typical setup includes:
- A 32-bit printer control board handling low-level motion tasks
- A dedicated host computer running Klipper and handling the heavier processing
- A web interface for control, monitoring, and quick mid-print adjustments
Because the configuration files are human-readable, they’re easier to review and standardise across multiple machines. In education settings, this often helps students understand motion systems instead of treating firmware like a black box. Version control can also be used, supporting traceability and repeatable setups, with clearer change history and fewer surprises.
Mistakes still happen, as expected. Common ones include setting acceleration beyond what the frame can handle or skipping Input Shaping calibration. According to Les Pounder, real-world results often depend more on careful tuning than raw speed.
Klipper is an advanced firmware that allows your 3D printer to run faster while still maintaining quality.
Industrial Use Cases in Australia
High‑mix, low‑volume production is where Klipper often works best in Australia. Teams can adjust profiles for different materials, nozzle setups, and job needs without long setup times. That flexibility supports modern manufacturing workflows and faster responses to custom orders, which often change at the last minute. In my view, that quick turnaround is a big reason it has moved beyond hobby use.
Klipper firmware isn’t just for enthusiasts anymore. Local manufacturers use it for real production work across engineering, research, and applied manufacturing. These are real shops with fixed deadlines, and that shift points to how reliable the platform has become.
In prototyping, speed usually matters most. Engineers can run several design changes in a single day, one after another, without long breaks between jobs. That pace shortens development cycles and reduces risk, especially when building custom machines that rarely work perfectly the first time.
For tooling and fixtures, repeatability matters. Klipper’s motion accuracy keeps tight tolerances consistent from batch to batch. This is important when printed parts connect to CNC machines or assembly lines, where small alignment problems can cause costly downtime.
Education is another area where Klipper appears more than expected. TAFE and university programs use it to teach modern motion control, helping students link software, electronics, and mechanics in real systems.
Advanced Considerations for Continuous Printing
One common surprise with high-speed printing is how fast heat turns into the main limit. Motors and hot ends run harder for longer stretches, which raises the risk of heat-related failures if temperatures aren’t watched closely. On long, nonstop jobs, these problems usually appear early instead of building up slowly.
Klipper firmware helps by using built-in monitoring made for everyday printing. Temperature limits and automatic shutdowns often catch trouble before real damage happens, which is useful for overnight or multi-day prints. Remote tools help here as well. Webcam and sensor support make it easier to spot small changes before they grow into larger failures.
Redundancy matters more in this setup. Supply problems often force shops to swap single-board computers with little warning, and Klipper’s wide hardware support keeps those changes manageable. As updates roll out, the focus stays on stability, automation, and remote oversight, like keeping a long print running safely when no one is nearby.
Making Klipper Work in Your Workflow
To get the most out of Klipper firmware, I usually find it helps to see it as part of a bigger system, not just software on its own. Hardware quality matters just as much, and frame stiffness often shows up in print results sooner than people expect. Cooling also affects many setups in very real ways. There aren’t real shortcuts here. Firmware can’t make up for weak mechanical basics, even if it’s tempting to hope it can.
If you start with realistic targets, things tend to go smoother. It’s often easier to raise speed in small, controlled steps over time. Testing changes on real, usable parts instead of only benchmarks helps catch details those tests miss. Profiles should be written down so results can be repeated across teams and machines.
In professional settings, standardisation usually helps. Shared configs reduce variation, but staff also need training on safe tuning, which is often skipped. This lowers risk and keeps output consistent. Simple, but still important.
Klipper rewards careful setup. With the right approach, it becomes a dependable production tool you can rely on every day.
Putting Klipper Firmware to Work
Higher speeds with tighter motion tuning usually catch attention first, and that makes sense. By shifting more control to the host, Klipper moves past long-standing FDM limits around acceleration and pressure advance. It isn’t magic (worth saying), and it’s not a shortcut either. Still, that added flexibility often matters more than it sounds if you enjoy shaping how a machine actually behaves and responds.
You tend to see the difference quickly in real use. Engineers and manufacturers often get faster design cycles, sturdier jigs or fixtures, and short-run parts that are consistent enough to use right away, not just for testing. In classrooms, educators can teach modern digital manufacturing instead of older firmware habits, and students usually notice the change almost immediately.
So what helps most when serious optimization is the goal? A useful approach is to start small and tune carefully, without rushing. As confidence builds, printing parts for real work or teaching makes the gains easier to see, like shorter print times and fewer failed runs.
