Table of Contents
3D Printer Calibration: Advanced Techniques for Precision
Spend enough time around FDM printers and a pattern usually shows up pretty quickly. Speed on its own doesn’t get you very far, even though many people only realize that after a few failed prints. A printer can move fast, but when parts come out off-spec, the real cost shows up as wasted material, extra reprints, and a workflow that feels hard to trust. In real use, speed alone rarely fixes much. That’s why 3D printer calibration often matters more than almost any hardware upgrade you can buy, especially once printing becomes a regular habit instead of a one-off experiment.
For industrial engineers, educators, and detail-focused power users, calibration is not something you finish once and move on from. It usually becomes part of a daily or weekly routine, sometimes more often than expected. As tolerances get tighter and cycle times drop, small issues start stacking up. Missed steps, uneven extrusion, or slow heat drift can creep in without much warning. Those problems show up in finished parts fast, whether you’re ready for them or not.
This guide looks at advanced calibration for precision printing. Instead of shortcuts or lab-only examples, it builds on basic FDM setup and then moves into motion tuning, extrusion control, thermal balance, and firmware tools as they work together in real machines. The key idea is how modern high-speed systems keep accuracy steady as production ramps up.
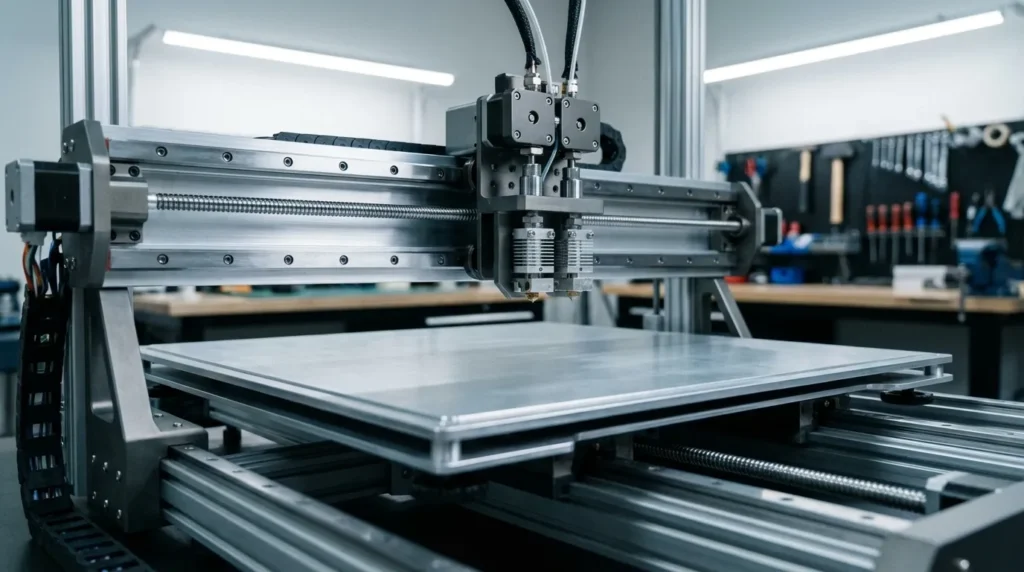
If you’re running a RatRig V-Core, an IDEX setup, or another industrial-style platform, these techniques help produce parts that fit, function, and repeat reliably. Consistency, more than raw speed, is usually the first win you notice, especially when the next print matches the last one.
Understanding Real Accuracy Limits in FDM 3D Printer Calibration
What surprises many users is how wide the accuracy range can be on the same FDM printer. Most of the time, this comes down to setup, not secret settings. Before changing anything, it helps to reset expectations about what “accurate” means here. Many people expect CNC-level precision, which usually isn’t realistic for this process. FDM works differently, and that difference often causes confusion. Plastic shrinks as it cools, layers are laid down one at a time, and even stiff motion systems can flex a bit during fast moves. None of these issues are huge on their own, but together they add up.
With careful calibration and regular checks, industrial FDM printers can reach solid accuracy. Desktop machines, especially right out of the box, usually run with looser tolerances. That gap isn’t just about frames or electronics. Day-to-day process control often matters more, from the first setup to how consistently the printer is maintained, even during busy periods.
Let us look at verified accuracy ranges seen across FDM systems in real-world use.
| Printer Category | Typical Accuracy | Lower Limit |
|---|---|---|
| Desktop FDM | ±0.5% | ±0.5 mm over 100 mm |
| Industrial FDM | ±0.15% | ±0.2 mm |
| Typical XY Accuracy | ±0.1, 0.3 mm | Depends on setup |
These ranges help explain why calibration matters so much. The same machine can end up near the worst or best end. Rushed setup pushes it one way, while slow tuning and repeat checks pull it back, like adjusting a test cube until the dimensions finally match.
Motion System Calibration for High-Speed Precision
As print speeds climb, motion issues are usually the first signs that something is off. Ringing at corners, small layer shifts, or those hard-to-ignore ripples tend to appear early. Edges may even look softer than planned. In most cases, these clues aren’t slicer problems. They usually point to how the printer is physically moving during a job, and that becomes clear pretty quickly once you start looking.
What surprises many people is that a lot of these problems start with very basic mechanics. A frame that isn’t square, for example, can quietly throw everything out of line. A simple ruler check often shows more than expected. Belt tension issues also show up if you slowly move the axes and pay attention to how smooth the motion feels. Moving slowly helps you notice gritty spots or uneven travel. On CoreXY machines, uneven belt paths often cause skew, and that kind of issue usually can’t be fully fixed in software later, which can be frustrating.
Once the hardware feels right, firmware motion tuning starts to matter more. Features like input shaping and resonance compensation sound complex, but they’re very practical. They measure vibration and adjust acceleration so the printer shakes less and lines look cleaner in most cases.
Klipper firmware has made this process common. Instead of guessing safe speeds, the machine is tuned to what it can actually handle. Fast travel moves stay accurate rather than sloppy, even when limits get pushed.
This is also where advanced users often rely on visual guidance and real examples, especially when printer behavior starts getting strange.
Acceleration balance is another setting that needs care. Higher acceleration can cut print time, which sounds great, but pushing too far often causes overshoot and corner artifacts. For many industrial FDM setups, dependable accuracy usually sits around 150 to 300 mm per second of print speed, even if higher numbers are advertised.
Extrusion and Flow Calibration That Actually Matters
Extrusion errors cause a lot of frustration because they often go unnoticed at first. A print can look fine but still be off when measured, with holes a bit too small and walls thicker than planned. That kind of issue is easy to miss, and it trips people up more than they expect. In real use, flow is usually the main reason, even though it’s often the last setting people think to check.
For years, steps‑per‑millimeter tuning was the usual fix. That approach made sense and worked well for a long time. Modern systems now use rotation distance or similar methods instead. These give more precise control and make it easier to repeat results across multiple machines, which helps a lot when running more than one printer. The result is fewer surprises once a print starts.
Flow calibration works best when done per material. PLA, ABS, nylon, and fibre‑filled filaments all behave differently, and tougher materials tend to be less forgiving. Even a color change in the same filament can shift flow enough to affect tight tolerances, often at the worst moment. Therefore, proper 3D printer calibration for each material is essential for consistent results.
Layer height matters more than it first seems. Many studies show how strongly it affects accuracy. Thicker layers save time but usually add variation. Thinner layers give tighter results but depend on steady temperatures and consistent extrusion, which isn’t always easy.
Here is a simple comparison that helps teams find a workable balance. Nothing fancy, just practical.
| Layer Height | Print Speed Impact | Dimensional Control |
|---|---|---|
| 0.3 mm | High speed | Lower accuracy |
| 0.2 mm | Balanced | Good accuracy |
| 0.1 mm | Slower | High accuracy |
Pressure or linear advance is another setting worth dialing in. It controls pressure buildup in the nozzle. Without it, corners can bulge and edges lose shape, especially at higher speeds, and that difference shows clearly on real parts.
Bed, Z-Axis, and Thermal Stability Calibration
Z-axis issues can wreck first layers and cause tall prints to warp much sooner than most people expect. That’s why good prints usually start with a solid bed setup, even when it’s tempting to rush ahead. Skipping steps may look fine at first, but problems often show up later in frustrating ways.
Auto bed meshing helps, but it rarely fixes everything by itself. The bed still needs to be physically flat and able to stay that way as temperatures change. Many industrial printers use thick tooling plates because they shift less when heated, which explains their steady results and extra weight.
Z-offset works best when it’s set mechanically first, then fine-tuned in firmware. Small adjustments are okay. Relying only on software often hides hardware problems instead of fixing them, and those usually return later.
Thermal stability matters just as much. As the printer heats up, the frame expands, and long prints make this easier to notice. Enclosures help keep temperatures steady, which works well for engineering materials and is easier to manage overall.
Cooling also needs careful tuning. Too much airflow can cause shrinkage and pull layers apart, especially around sharp corners. Good prints come from controlled cooling, not fans running at full speed.
Common mistakes include leveling the bed while the printer is cold or changing materials without updating profiles or checking enclosure airflow. Small slip-ups like these can undo an otherwise careful setup. Consequently, ongoing 3D printer calibration ensures stability and repeatable performance.
Advanced 3D Printer Calibration for Dual Extrusion and IDEX Systems
Dual extrusion adds a lot of capability, and it almost always adds extra complexity at the same time. IDEX setups can work very well in production settings, but only if calibration gets real, ongoing attention. In day-to-day use, taking shortcuts usually causes problems later.
Even small alignment errors show up quickly. X/Y and Z offsets need careful tuning, followed by another check to lock them in. A 0.1 mm error is often enough to cause uneven layers or visible seams. Tiny shifts matter here, and they don’t stay hidden for long.
Temperature control between tools is just as important. If cooling can’t keep up, heat from one nozzle can move into the other, especially during frequent tool changes. Over long prints, that slow heat buildup often leads to visible drift, which is frustrating, in my view.
Material pairing works best when each extruder has its own flow and retraction settings. Using one shared profile usually leads to issues sooner than expected. A helpful method is mirrored test parts: printing the same model on both heads makes calibration differences obvious right away.
Putting It All Into Practice for Reliable Production
What usually makes the biggest difference is treating calibration as a regular habit instead of a special event. Many industrial users are moving away from one‑off tuning sessions that are hard to repeat and toward workflows they can run the same way every time. It’s more of a daily mindset than a last‑minute fix when a print goes bad (which happens, let’s be honest).
You’ll often get clearer results by starting with a standard calibration part printed on a set schedule. Measuring once helps, but tracking results over several runs is where patterns start to appear. That’s when calibration feels like real process control you can trust and explain to someone else.
Once material‑specific profiles are stable, consider creating them and locking them in. Even when the steps feel routine, especially then, consistent operator behavior still matters.
Automation helps too. Firmware tools for bed meshing, flow checks, and motion limits can cut down on simple human mistakes. Time spent tuning now often pays off later, like when a high‑speed FDM job runs clean all week without mid‑week surprises.
Ultimately, consistent 3D printer calibration transforms reliability and productivity, ensuring precision parts every time.
