Table of Contents
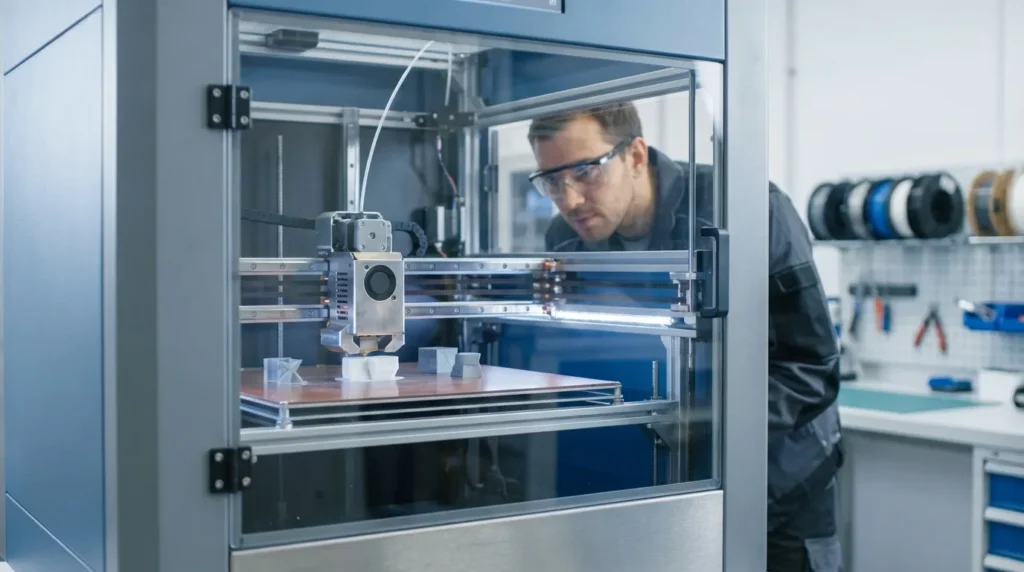
Essential 3D Printer Calibration Techniques for FDM Printing
High‑speed FDM printing looks impressive, no question. But speed by itself usually doesn’t lead to usable parts, and most teams have seen that firsthand. What actually turns fast motion into parts you can trust day after day is calibration. For industrial engineers, educators, production teams, and advanced users, 3D printer calibration isn’t a one‑time setup job you tick off and forget. It’s an ongoing process that helps hold tight tolerances, keeps surface finish steady as machines wear in, and supports part strength during assembly, testing, and real‑world load use. It’s not optional. It’s just necessary, especially once printers are pushed hard.
Across Australia, more manufacturers are using FDM printers for jigs, fixtures, tooling, and short‑run production, often to avoid long lead times. Platforms like the RatRig V‑Core and machines running Klipper can move much faster than older desktop printers ever could. That extra speed often brings more vibration, higher heat stress in the hotend and frame, and extrusion problems that show up quickly. When calibration is skipped, those issues stack up fast, often before anyone notices. There’s usually very little warning.
This guide looks at practical FDM calibration techniques that matter on the production floor. Mechanical setup, extrusion accuracy, motion tuning (including the messy edge cases), thermal control, and long‑run repeatability are all covered. The focus stays on changes that make the biggest difference for high‑precision work, not endless tweaking. If the basics are already familiar, this is about tightening that last 10 percent, the gap between hobby‑grade output and parts you can actually ship. For a deeper dive into related methods, see our Essential Guide to 3D Printer Calibration: Techniques for Precision and Performance.
Along the way, it also shows where calibration fits into a wider workflow: firmware choices, maintenance schedules, and how materials are stored, dried, and handled over time, which teams often overlook until problems start showing up.
Why 3D Printer Calibration Matters More at High Speed
Modern FDM printers move much faster than they did just a few years ago. Industrial and prosumer machines can now hit 500 to 600 mm per second in controlled setups, usually with stiff frames and well-tuned motion systems. That’s a big jump from the 50 to 80 mm per second many engineers started with earlier in their careers. At these speeds, print times drop fast, but small setup issues stop staying hidden once the machine speeds up.
On slower printers, slightly loose belts or extrusion that’s off by a few percent often slide by without causing trouble. Push the speed higher, and those same flaws tend to show up right away. Vibration turns into ringing on sharp corners. Uneven extrusion becomes weak layers that crack under load. Even small Z-offset drift can ruin first layers in minutes, sometimes before anyone is watching. Scrap piles grow fast, and most teams have seen this happen.
Recent market data helps explain the tension. Auto-calibration tools keep getting better, and searches for manual calibration are down about 30 percent. That’s usually a good sign. Still, it hints that many users lean on automation without fully knowing where it breaks down.
rows={[“High-speed FDM motion”,“500, 600 mm/s”,“Industrial and prosumer systems”],[“Legacy FDM motion”,“50, 80 mm/s”,“Older desktop printers”],[“Calibration search decline”,“~30%”,“Rise of auto-calibration tools”]]}
caption=“FDM speed and calibration context”
/>
In production settings, engineers still need to check results. Automated routines usually don’t account for worn nozzles, filament batch changes, humidity swings, or slow frame wear over time. That real-world variation is why 3D printer calibration knowledge stays important, especially when fast machines run every day and tolerances are tight, often when problems decide to appear.
Mechanical Calibration Comes First
Before you mess with firmware tweaks or slicer profiles, mechanical calibration usually needs to be handled first. This step gets rushed more than it should (I’m guilty of it too), even though it quietly sets the limits for everything that follows. Frame alignment, belt tension, linear rail condition, and motor mounting all affect how accurately the toolhead actually moves on X, Y, and Z during a real print, not just on paper.
What catches many people off guard is how small mechanical issues later show up as “software problems.” Frame squareness is a good example. Even tiny twists can cause dimensional errors that software can’t really fix. On V-Core style machines, checking diagonals from corner to corner often spots this early. It’s also worth re-squaring after moving the printer or running long stretches of high-speed prints. Small shifts stack up faster than most people expect, as annoying as that is.
Belts are another common trouble spot. Uneven tension usually causes more issues than belts that are obviously loose. Too little tension leads to backlash during fast direction changes, while too much slowly wears on motors and bearings (and you’ll often hear it). A simple routine is checking alignment, feeling for uneven resistance by hand, and making sure pulleys haven’t drifted out of place. Small details really matter here.
Linear rails should move smoothly from end to end. Dirt, old grease, or dry bearings can cause uneven drag, which often shows up as layer shifts or rough surfaces once speeds climb. A quick cleaning and fresh lube usually fix it.
Once the mechanics move in a predictable way, tuning resonance compensation or input shaping in Klipper-based setups makes a lot more sense (this step gets skipped too often). These basics are covered in more detail in the Essential Guide to FDM 3D Printer Setup and Optimization.
Extrusion Calibration for Dimensional Accuracy
Extrusion calibration is one of those areas where functional prints either work great or quietly fail, and it happens more often than people think. Even small extrusion mistakes can stack up fast, leading to off wall thickness, holes that don’t fit, weak layer bonding, or rough surfaces. At higher print speeds, over-extrusion often builds extra pressure in the hot end, which is why blobs and stringing appear around corners and fine details. Fit problems are usually the first clue that something isn’t right.
Most workflows start with extruder steps per millimetre, usually called E-steps. Instead of trusting what the firmware says, you measure how much filament actually moves and compare it to what was commanded. When those numbers match, you have a solid baseline. Without this step, slicer flow settings or downloaded profiles rarely work as expected.
Next comes the extrusion multiplier, also known as flow rate. This setting accounts for filament diameter changes and how different plastics melt and compress, which can vary more than you’d expect. Many engineers use single-wall test prints and measure them with accurate digital calipers. The goal isn’t “close enough,” but a wall thickness that matches the slicer exactly.
Dimensional accuracy targets vary by printer type. Well-tuned industrial FDM systems often stay within a few tenths of a millimetre, even at higher speeds, which is still impressive.
rows={[“Entry-level FDM”,“±0.3, 0.5 mm”,“Visual models”],[“Tuned mid-range FDM”,“±0.1, 0.2 mm”,“Functional prototypes”],[“Industrial-grade FDM”,“±0.05, 0.15 mm”,“Tooling and fixtures”]]}
caption=“Dimensional accuracy expectations for FDM printers”
/>
Consistent flow also makes pressure advance and retraction tuning easier. Once extrusion is stable, those settings usually behave more predictably and take fewer retries, after the basics are truly dialed in.
First Layer, Z-Offset, and Bed Control
The first layer still causes more failed prints than anything else, honestly, and that surprises a lot of people. Fast printers don’t get a free pass here. In fact, they often react worse to small setup mistakes. Stiff frames and strong motion systems leave very little room for error. With less margin, tiny problems show up right away, which is why fast machines make first‑layer issues feel extra obvious even when everything seems fine.
Z‑offset sets the exact gap between the nozzle and the build surface on that first layer. If it’s too high, filament won’t stick at all. If it’s too low, the plastic gets squished too much, ruining the bottom surface and sometimes clogging the nozzle, which you’ve likely dealt with before. Over time, Z‑offset tends to drift as nozzles wear down, beds get swapped, or plates are resurfaced, and those small changes add up quickly.
Bed leveling goes hand in hand with this. Whether you’re using manual knobs, mesh leveling, probe systems, or fixed shims, the nozzle needs to stay the same distance from the bed everywhere. Flatness matters a lot on large printers, where mesh leveling helps deal with plates that aren’t perfectly flat, which is most of them.
Environmental factors also matter. Enclosures keep temperatures steady, reduce warping, block drafts, and protect the first layer during long prints. When printing fast with engineering filaments, a well‑tuned enclosure often becomes part of calibration, not just a nice extra, and that’s usually where the biggest improvement shows up.
Motion Tuning and Resonance Control
Once print speeds start climbing, motion tuning matters more than many people expect, especially past the 400 mm/s mark. Problems that stay quiet at lower speeds tend to show up quickly: ringing, ghosting, surface waves, and faint echo lines along the walls. When this happens, it usually means the frame or axes still have some resonance that needs attention.
Klipper firmware changed how many users handle this, and for most people it’s been a good shift. Input shaping relies on vibration data measured from the actual machine instead of guesses. In real use, this often results in cleaner surfaces, even when acceleration is pushed much higher than before, sometimes nearly double.
Tuning usually starts by finding resonance frequencies one axis at a time, most often X before Y. Accelerometers are common now, but test prints still matter and can reveal issues that graphs don’t catch. Once shaping is set correctly, higher acceleration doesn’t have to ruin surface quality.
Pressure advance works alongside this by focusing on what’s happening inside the nozzle. It controls pressure during speed changes, which helps keep corners sharp and extrusion steady. It works well, but it rewards patience.
For a wider look at how this fits into full printer calibration, frame, flow, and temperatures, it’s covered in the Ultimate Guide to FDM 3D Printer Calibration Techniques. A solid reference for frequent tweaking.
Filament, Thermal Control, and Repeatability
Calibration doesn’t stop with the machine itself. Filament behavior often has just as much impact on print consistency, and it’s easy to overlook during everyday setups. Moisture is the quiet problem here, the kind you don’t notice until a real job starts failing. When filament absorbs water, melt flow and layer bonding can change, and issues show up quickly, especially with nylon and many composite materials.
Dry storage usually makes a bigger difference than people expect. Filaments work best in sealed bins or dry boxes, and they often need to be dried again before important jobs, even if they were dried recently. It sounds basic, but it gets skipped. Another helpful habit is tuning extrusion and temperature for each material you use. PLA, ABS, PETG, and carbon‑filled nylons all react differently to heat, speed, and small setup tweaks, so shortcuts rarely work.
Thermal control goes beyond the hot end. Cooling matters too. At high flow rates, heaters need to stay steady, and part cooling should support the shape without weakening layer bonding. For production work, simple documentation helps more than expected. A basic calibration log makes repeatable results across machines and over time feel much more reliable.
Turning 3D Printer Calibration into a Reliable Workflow
Calibration works best when it’s treated as a connected system, not a checklist you rush through. Mechanical setup feeds straight into motion tuning, and that tuning often shows up later in extrusion consistency during long runs. Thermal stability is quieter, but it often decides whether a long print stays steady or slowly drifts halfway through. The small details really do add up. When steps are skipped, the time you thought you saved usually comes back as failed parts or extra rework, frustrating, and often more costly than expected.
For Australian manufacturers running FDM printers in production, the real goal is confidence. Being able to hit start and trust that the part will stay within tolerance by the end of the shift matters more than chasing small speed gains. That confidence usually comes from regular mechanical checks, clearly written slicer settings, and a practical sense of how a specific machine behaves on a normal Tuesday, not a perfect lab day.
Things get more demanding with dual extrusion or IDEX systems. Tool alignment, nozzle offsets, and material interactions need closer attention, because small errors can stack up fast in real jobs. That’s why the IDEX System Installation & Calibration for V-Core 3D Printers guide focuses on those problem areas. Additionally, dual extrusion setups benefit from targeted Dual Extrusion 3D Printer Calibration for Precision & Quality methods to ensure multi-material prints meet specifications.
High-speed, high-precision FDM printing is very achievable today, and most shops already have capable hardware. Calibration is what usually turns that potential into reliable, day‑to‑day production results.
