{
"title": "Dual Extrusion 3D Printer Guide: Maximizing Your 3D Printing Potential",
"metaDescription": "Discover how a dual extrusion 3D printer can boost your 3D printing techniques with multi-material capabilities, speed, and precision for professionals.",
"content": "Anyone who’s spent time with FDM 3D printers has probably hit the limits of a single-extruder setup. Imagine working on detailed aerospace models or guiding a classroom full of curious students through advanced manufacturing in an Aussie lab, while answering endless “what’s happening in there?” questions. At some point, you run into the usual headaches: tricky shapes that are a pain to support, filaments your machine just won’t handle, or wanting to boost speed without ruining print quality. That’s often when a dual extrusion 3D printer starts to really make a difference. \n\nWith a dual extrusion 3D printer, you can load two filaments at once, making multi-material prints possible. Water-soluble supports that wash away? Yes. Printing two identical parts at the same time? Definitely. Even adding a bright color accent is simple. For engineers, production crews, and passionate makers, it’s often a big leap forward, opening up new things you can create right at your workbench. \n\n
\nDual extrusion technology is not just about printing in two colors; it’s about combining different material properties in a single part, which is transformative for functional prototyping and end-use applications.\n
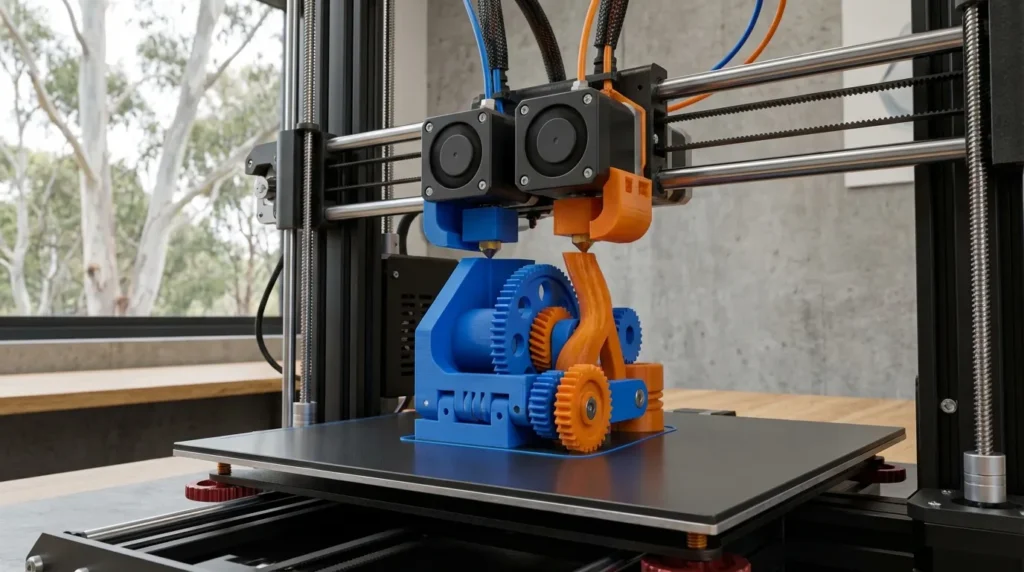
\n\n## Understanding Dual Extrusion 3D Printer Technology\n\nDual extrusion means a 3D printer can work with two separate extruders or nozzles. Sometimes both are built into the same print head, but in more advanced setups they’re completely independent, that’s called IDEX. This is handy because each extruder moves on its own, letting you print two parts at the same time, create mirrored designs, or mix materials in one job without the awkward collisions that often happen with single‑nozzle machines.\n\nIn everyday use, this opens up a lot of creative and practical options. One popular method is loading one extruder with a strong engineering filament like nylon, while the other carries a soluble support material such as PVA. This pairing makes tricky internal channels, steep overhangs, and tight interlocking features much easier to pull off. Some makers take it further by using a high‑temperature nozzle for specialty polymers alongside a standard one for common materials, producing hybrid parts that come off the printer ready to use, no glue joints or extra hardware needed.\n\nThe 3D printing market is growing fast, worth **$24.61 billion in 2024** and expected to reach **$29.8 billion in 2025**. Desktop printers alone could jump from **$6.7 billion in 2025** to **$11.9 billion by 2030**. Dual extrusion is becoming common in industrial settings, especially where designs are detailed and parts need to handle real‑world stress.\n\n\n\nWhat used to feel like a hobbyist’s extra feature is now often a real manufacturing tool, cutting down assembly steps, improving part strength, and helping ideas turn into finished pieces faster.\n\n## How a Dual Extrusion 3D Printer Improves Production Efficiency\n\nIn many production setups, the big advantage of dual extrusion is how it saves hours on each job. With IDEX systems, two identical parts can print at once, right next to each other on the bed. For anyone making jigs, fixtures, or small-batch runs, this often means faster turnarounds that keep orders moving without delays. \n\n
\nIndependent dual extrusion allows manufacturers to print mirrored or duplicated parts simultaneously, cutting production times significantly.\n
\n\nAustralian manufacturers understand the stress of tight tooling deadlines, where a single holdup can pause an entire line. In electronics assembly, getting multiple precision fixtures done overnight can be the difference between shipping on schedule or working late to catch up. The benefits aren’t only about speed, though. A dual extrusion 3D printer makes tricky builds with dissolvable supports much simpler, removing the need for time-consuming sanding or risky part cleanup. Picture a delicate medical prototype with fine grooves, supports dissolve in water, keeping every detail perfect. With fine-tuned slicer settings and a solid workflow, teams often boost output by around 30%, and during busy runs, close to 50%. \n\n\n\n## Multi-Material 3D Printing Techniques with a Dual Extrusion 3D Printer\n\nDual extrusion really starts to shine once you explore printing with different materials in the same object. Picture a sturdy PLA frame paired with soft, flexible TPU hinges that bend exactly where needed, like a smartly made toy joint. Or think about a strip of conductive filament hidden inside a strong outer shell, ready for electronics to be added. With two extruders loaded with separate materials, they can work together so the whole piece prints in one smooth process. \n\nThis makes it possible to create prototypes that are not only functional but also fun to design. You could make parts with comfortable grips, tight seals, or built-in channels for wiring. Industries from medical to aerospace often find these material mixes very useful. A drone builder could create a tough ABS body and then add shock-absorbing TPU pads in spots most likely to take a hit. An architect might print scale models with clear windows already set into textured walls, no tricky assembly afterward. One project, multiple materials, all printed at once. \n\nGetting good at this takes some practice, adjusting temperatures, timing material changes, and planning toolpaths so plastics bond well instead of pulling apart. More tips here: [Dual Extrusion 3D Printer Techniques for Multi-Material Printing](https://raven3dtech.com.au/dual-extrusion-3d-printer-techniques-for-multi-material-printing/). You can also explore the [Dual Extrusion 3D Printer: Benefits, Challenges & Tips](https://raven3dtech.com.au/dual-extrusion-3d-printer-benefits-challenges-tips/) guide for deeper insights.\n\n## Common Mistakes to Avoid with a Dual Extrusion 3D Printer \n\nDual extrusion can unlock all kinds of creative print options, but it’s easy to run into problems if you’re not paying close attention. Here are some of the most common issues people run into: \n\n- **Poor calibration**: If the nozzles aren’t lined up just right, even slightly, you can end up with layers that don’t match or colors smearing into each other.
- **Incompatible materials**: Some filament combinations simply don’t bond well, no matter how much you adjust settings.
- **Too much ooze**: Incorrect retraction settings can leave fine strings or random blobs scattered on the print.
- **Skipping cooling changes**: Switching between materials without adjusting airflow often leads to rough surfaces. \n\nDialing in calibration can make a big difference. RatRig V-Core owners with IDEX setups will find the [IDEX System Installation & Calibration for V-Core 3D Printers](https://raven3dtech.com.au/idex-system-installation-calibration-for-v-core-3d-printers/) guide worth keeping handy, alongside the [Ultimate Guide to FDM 3D Printer Calibration Techniques](https://raven3dtech.com.au/ultimate-guide-to-fdm-3d-printer-calibration-techniques/).\n\nCooling needs can be tricky, PLA likes strong airflow, while ABS can warp if cooled too much. Mixing them without airflow changes can hurt layer bonding. Keep an eye on nozzle wear too, especially if one is printing with abrasive filament. A few careful test runs, regular upkeep, and smart filament choices usually keep prints sharp and clean.\n\n## Advanced Applications and Industry Trends for Dual Extrusion 3D Printers\n\nAs 2024 and 2025 roll in, more Australian manufacturers are getting into large‑format IDEX printing, some testing the waters carefully, others jumping right in. You’ll find workshops producing batches of custom tools, like jigs and fixtures made for specific jobs, while others turn to short‑run products or trial runs with eco‑friendly materials to keep production cleaner and often cheaper. \n\nSustainability is becoming less of a buzzword and more of a practical move. With dual extrusion setups, it’s common to use recycled filament for parts that don’t need extreme strength, then switch to high‑performance polymers where durability matters, like load‑bearing areas. This mix can cut waste and lower costs in a noticeable way. Aerospace teams are already using it, and car makers combine lightweight shells with reinforced spots, such as a dashboard core in recycled ABS, strengthened at stress points with carbon‑fiber nylon. In healthcare, it’s making patient‑specific implants in safe materials alongside dissolvable surgical guides in one print run. \n\nIt’s a smart blend of accuracy, efficiency, and sustainability that’s making a difference across industries.\n\n## Implementing a Dual Extrusion 3D Printer in Your Workflow\n\nThinking about adding dual extrusion to your workshop or classroom? A good way to start is by taking on steps that feel doable and then building from there. \n\n1. **Pick a printer that fits your projects**: For detailed, multi-material prints, industrial-grade machines with IDEX often work best, especially if you need to print flexible parts alongside rigid ones.
2. **Test your materials early**: Some filaments stick together perfectly, while others just won’t. Trying them out before a big job can save you from a model breaking apart halfway through.
3. **Fine-tune your slicer settings**: Retraction, nozzle wiping, and temperature all matter. You’ll likely need to adjust these a few times before your prints consistently look clean.
4. **Plan your designs ahead of time**: In CAD, you can add dissolvable supports, striking color changes, or layered materials to make your work stand out. \n\nKeeping a set of dependable dual extrusion profiles for different filament combos can save a lot of time. In classrooms, showing a single-extrusion print next to a dual-extrusion one often sparks interest. And if speed matters, an enclosure helps keep temperatures steady, important for printing engineering polymers that can warp when exposed to sudden drafts. More on that here: [3D Printer Enclosure Setup for High-Speed FDM Printing](https://raven3dtech.com.au/3d-printer-enclosure-setup-for-high-speed-fdm-printing/).\n\n## Making a Dual Extrusion 3D Printer Work for You\n\nA dual extrusion 3D printer isn’t just a fancy add-on, it can change how you put projects together. Mixing different materials, speeding up prints, and making complex shapes that single-extrusion machines usually can’t handle opens up new options. For people in Australia working in manufacturing, engineering, education, or creative fields, this often means prototypes delivered faster, smoother daily workflows, and designs that grab attention outside the tech world.\n\nWhere does your process slow down? Those choke points can tell you a lot. You might discover that using dissolvable supports saves hours of messy cleanup, or that printing several parts at the same time gives your productivity a clear boost. A smart move is to pick a dual extrusion setup that fits your way of working, think about build size for bigger jobs, materials that match your needs, how easy it is to maintain, and features you’ll actually use. Then track the real stats, success rates, finishing time, and total output, to see genuine improvements in your process."
}