Table of Contents
3D Printing Nozzles: Understanding Their Impact on Print Quality
If you work with FDM 3D printers every day, you’ve probably seen how small tweaks can lead to big changes, especially when production pressure is on. One part that often gets overlooked is the nozzle, which is a little strange considering how central it is to printing. It’s small, low-cost, and easy to swap, yet it directly affects print speed, surface finish, part strength, and repeatability. For industrial engineers and advanced users, the choice of 3D printing nozzles isn’t a hobby detail. It often decides how steady production runs are on the floor, shift after shift, job after job, and those results add up fast.
Across Australia, more teams are using high-speed FDM 3D printers for tooling, jigs, fixtures, and short-run parts. Systems like RatRig V-Core machines running Klipper firmware are built for high flow rates and fast acceleration; they’re made to move quickly. At those speeds, the wrong nozzle usually leads to weak layer bonding, accuracy problems, or extra downtime. A better-matched nozzle can cut print times while improving part strength, and it can also lower maintenance between jobs, leading to fewer stops and more consistent output.
This article looks at how different 3D printing nozzles affect quality on FDM 3D printers. It covers nozzle diameter, materials, high-flow designs, and common mistakes people keep making. It also looks at real data and industry trends, with practical advice for production-focused users. Straight to the point, in my view.
Why 3D Printing Nozzle Diameter Controls Speed and Detail
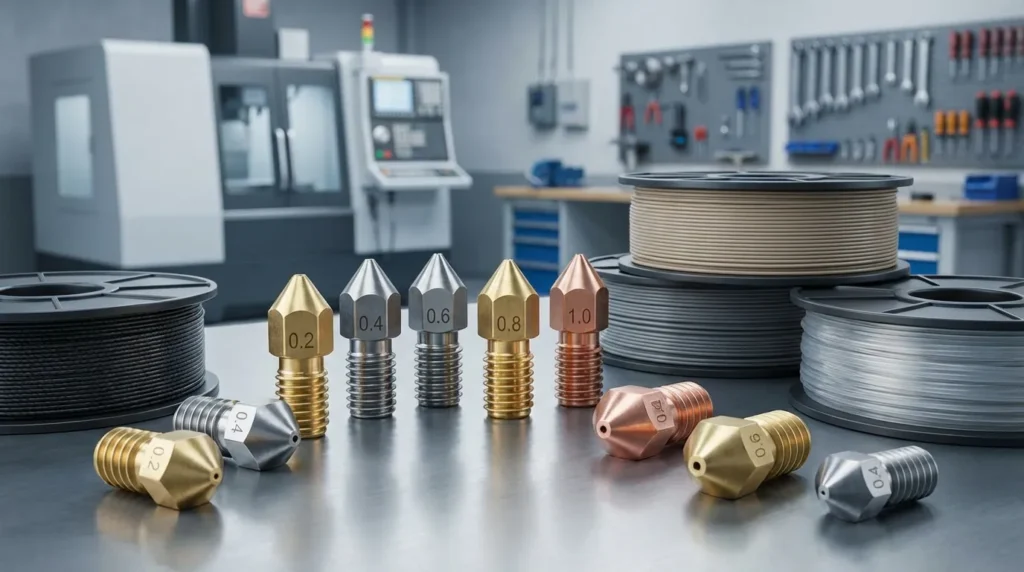
Nozzle diameter is usually the first setting people settle on, and it’s easy to overthink because it affects so many parts of a print at once. At a basic level, it controls how much plastic can move through the hot end and how thin each printed line can be. With a smaller opening, less material flows at a time. That often means sharper edges, smoother curves, and cleaner surface detail. Larger nozzles change the trade‑off. They push out more plastic per second, so bigger parts finish much faster. Layers also press together more firmly, which often improves durability in everyday, functional prints.
Most FDM printers come with a 0.4 mm nozzle, and that’s not by accident. It sits in a useful middle ground that works for most jobs. You get solid detail without stretching print time into an all‑day wait. Research commonly suggests keeping layer height under about 80 percent of the nozzle diameter. With a 0.4 mm nozzle, that puts the upper limit around 0.32 mm. Push past that and surface quality usually drops, with accuracy issues showing up on vertical walls.
Diameter affects more than layer height, which catches many people off guard. Extrusion width, corner sharpness, and how features join together all change with nozzle size. Smaller nozzles handle fine text, thin walls, and tiny holes better. Larger nozzles hide seams more easily and lay down wider beads, so parts under real load often end up stronger, in my view.
| Nozzle Diameter | Typical Layer Height | Primary Benefit |
|---|---|---|
| 0.2, 0.3 mm | 0.08, 0.2 mm | Fine detail |
| 0.4 mm | 0.2, 0.32 mm | Balanced use |
| 0.6 mm | 0.3, 0.48 mm | Faster prints |
| 0.8, 1.0 mm | 0.4, 0.8 mm | High throughput |
This link between nozzle diameter and print quality isn’t just based on personal experience. Studies and industry testing support it, including academic work from Dr. S. Rajkumar that reaches similar conclusions. No surprises there, honestly.
The small nozzle diameter and layer thickness will give good printing quality mainly in the precision of product.
For industrial users, this usually means picking small nozzles for precision parts. Fixtures, jigs, and tooling often work better with 0.6 mm nozzles or larger, especially when strength and speed matter more than fine detail.
Print Time, Flow Rate, and Production Efficiency
What most people notice first is how much print time drops once flow rate is taken seriously. Measured in cubic millimetres per second, it sets the real limit on how fast material can move through an FDM system, even though it’s a value that often gets ignored. Larger nozzles let more material pass through without pushing the hotend too hard. That may sound obvious, but in everyday printing it’s a change you clearly see when you check how long a job actually takes.
The data backs this up in a practical way. Industry figures show that moving from a 0.4 mm nozzle to a 0.6 mm nozzle can cut print time by about 28 percent for many parts. Stepping up to a 0.8 mm nozzle can push those savings closer to 32 percent, as long as the printer can keep up, which isn’t always the case. With the right setup, high-flow systems can reach around 30 to 40 mm³ per second, but only if the rest of the machine isn’t slowing things down.
Flow rate also affects reliability on longer prints. Keeping extrusion pressure in a safer range usually helps stepper motors stay cooler and filament feed more smoothly. In practice, that often means fewer skipped steps, more consistent extrusion, and fewer mid-print failures or layer gaps that tend to show up during faster production runs.
| Nozzle Size | Typical Flow Rate | Print Time Change |
|---|---|---|
| 0.4 mm | 10, 15 mm³/s | Baseline |
| 0.6 mm | 20, 25 mm³/s | ≈28% faster |
| 0.8 mm | 30, 40 mm³/s | ≈32% faster |
Firmware choices matter here too. Klipper, for example, makes it easier to run larger nozzles without losing accuracy. Pressure advance and input shaping take some tuning and patience, but they help control the side effects of higher flow. Josef Prusa from Prusa Research has said that pairing larger nozzles with high-flow hotends can increase speed while keeping part strength, as long as temperature and cooling are set correctly.
For Australian workshops handling short production batches, this isn’t just theory. It shows up directly as faster turnaround when parts need to move from printer to packing without unnecessary delays.
Nozzle Materials and Wear in Industrial 3D Printing Nozzles
Diameter is only half the story. Nozzle material often matters more for durability and long‑term print quality, yet it’s easy to miss in industrial setups. Many industrial filaments are abrasive, sometimes more than people expect. Carbon fibre and glass fibre, for example, can wear down brass nozzles quickly, especially when printers run for long shifts.
Brass nozzles transfer heat well and stay affordable, which is why they’re so common. They usually work fine for PLA and PETG in most workflows. When printing engineering materials, though, hardened options are often the safer pick. Hardened steel nozzles handle wear much better over time, but they often need slightly higher temperatures because heat transfer is lower. That tradeoff surprises many users.
Wear also does more than widen the nozzle. It slowly changes the internal bore, often in subtle ways. This damage can cause uneven extrusion and dimensional drift, issues that often go unnoticed until parts stop fitting or miss tolerances in production.
Hardened steel nozzles have become standard equipment, for instance, the P2S comes standard with a 300°C hardened steel nozzle. This addresses wear issues caused by abrasive materials such as carbon fibre or glass fibre, significantly extending maintenance intervals and ensuring stability during long-duration continuous production.
| Material | Wear Resistance | Best For |
|---|---|---|
| Brass | Low | PLA, PETG |
| Hardened Steel | High | CF, GF, Nylon |
| Ruby-tipped | Very High | Production runs |
| Tungsten Carbide | Very High | Industrial use |
Stefan Hermann from E3D points out that ruby‑tipped and ceramic designs tend to keep tighter tolerances over time. Consistency often matters more than raw speed here. Stable 3D printing nozzles support repeatable results, which matters for production‑grade FDM 3D printers, especially when the same job runs again and again.
High-Flow Nozzles and Modern Printer Design
High-flow nozzles aren’t just bigger holes, even though many people think they are. Most designs lengthen the melt zone and smooth the internal path so the plastic has enough time to melt as print speeds go up. That detail often matters more than expected. When melting can’t keep up, even a large nozzle can struggle, and the problem usually shows as thin, uneven lines instead of full clogs.
Modern industrial systems are built with this in mind. Platforms like RatRig V-Core and enclosed machines rely on steady extrusion while running fast, often for hours at a time. High-flow nozzles also make thicker layers easier to use without losing part strength, which helps a lot with functional prints. It may sound simple, but it makes a clear difference.
These designs usually reduce shear stress inside the melt path. That matters for filled or brittle filaments that don’t handle rough flow well (many users have had one snap during a print). With more even melting, layer adhesion often improves, so parts stay strong at higher speeds.
Dr. R. Kumar points out that the nozzle design directly controls melting and flow in this process.
Nozzle diameter is an important parameter of the nozzle design.
A common mistake is using a larger nozzle without adjusting temperature or pressure advance. That often causes rough surfaces or weak layers. A better method is to raise the nozzle temperature slightly, tune flow settings, and test with real parts instead of only calibration cubes, which can hide issues.
On long, continuous prints, thermal stability becomes key. Pairing high-flow nozzles with solid heaters cuts thermal lag and keeps extrusion steady, which usually matters most during overnight prints.
Choosing the Right Nozzle for Real Applications
Choosing the right nozzle usually comes down to the job, which reflects how most shops really work. When prototypes have tight fits, accuracy matters more, especially when parts need to line up cleanly and assemble without being forced. Jigs, fixtures, and educational labs often care less about fine detail and more about strength, quicker print times, and durability that holds up to frequent handling with little upkeep. Different needs naturally lead to different trade‑offs.
For functional prototypes, a 0.4 mm hardened steel nozzle is often a dependable, everyday choice that balances detail and consistency. Tooling and fixtures usually work better with 0.6 mm or 0.8 mm nozzles, since thicker lines improve layer bonding and reduce total print time, which adds up quickly. When printing abrasive materials, hardened steel nozzles or premium tips often pay off through longer life. Worth it, in my view.
Matching nozzle size to tolerance needs also helps. Larger nozzles often need extra allowance for holes and mating surfaces, so this should be planned in CAD and fine‑tuned again during slicing, where small tweaks matter.
Australian manufacturers often handle mixed workloads. Swapping nozzles and saving print profiles helps, keeping spares avoids delays, and tracking hours on abrasive filaments lets teams replace nozzles before quality drops. Fewer surprises, which is usually a good thing.
Putting Nozzle Knowledge into Practice
For industrial users, perfect surface finish usually isn’t the main goal. What matters more is getting results that stay consistent and strong while keeping up with production speed, and that balance isn’t always easy. The right nozzle choice often helps more than people expect.
Nozzles may be small, but they shape results in big ways. Diameter affects print speed and detail, and there’s usually a trade-off between the two. Material and design then influence wear, flow, and how steady extrusion feels during a run. Small parts, big impact, especially during long jobs where problems tend to show up.
In day-to-day work, the most successful teams treat nozzle selection as something they revisit, not a one-time choice. They often keep notes on what works, standardise setups, and include nozzle checks in regular maintenance routines, the boring habits that usually pay off.
Running high-speed FDM 3D printers? A useful approach is to look again at nozzle setup: match size to real part needs, switch to hardened options for abrasive filaments, and re‑dial settings after changes, where even small tweaks can show up on the shop floor.
Ultimately, understanding 3D printing nozzles helps engineers make better decisions and maintain consistent production quality across diverse applications.
