Table of Contents
3D Printer Upgrades: Essential Guide to Enhanced Performance
Upgrading a 3D printer isn’t just a side hobby anymore. For many Australian engineers and people working in education or manufacturing, it’s often the most practical way to get industrial-level results without buying a whole new system, which usually costs a lot. Stock printers hit their limits pretty fast, and that’s a common frustration. When you push for higher speeds, surface quality and accuracy often drop at the same time, and that rarely ends well. Long print jobs also fail more often when heat control or motion systems can’t keep up, and you’ve probably seen that happen before. It’s frustrating. This is usually the point where well-planned 3D printer upgrades start to matter in everyday work, not just for test prints or one-off parts.
From my experience, performance upgrades can turn a solid FDM machine into a dependable production tool, but only if you choose them carefully. With the right motion system, a matched extrusion setup, reliable firmware, and stable thermal control, you can often run faster while keeping tight tolerances, though tuning is still required. There are no shortcuts. This guide explains how to upgrade with clear priorities. It focuses on real limits backed by research, not trends, so you can see where bottlenecks actually come from and avoid mistakes that slow teams down.
The goal is simple. Build a high-speed, high-precision FDM printer that works day after day, not just during a good week when everything goes right.
Why 3D Printer Upgrades Matter in Industrial FDM Printing
Industrial demand for FDM printing keeps growing, and the reasons are pretty straightforward. Faster turnaround and local production usually lead the way, especially when tooling has to change as requirements shift, which happens more often than teams expect. The global 3D printing market reached USD 30.55 billion in 2025 and is set to grow again in 2026. Nearly half of that now comes from entry-level and prosumer systems. These machines are used heavily for real production work, not just prototypes, and in my view that often pushes performance expectations in a very practical way.
| Metric | Value | Year |
|---|---|---|
| Global 3D printing market size | USD 30.55 billion | 2025 |
| Projected market size | USD 37.64 billion | 2026 |
| Industrial 3D printing market | USD 5.22 billion | 2026 |
| Prosumer and entry-level revenue share | 48% | 2025 |
For Australian users, upgrades often make more sense than importing large industrial systems. Long lead times are common. Shipping costs add up fast. Downtime usually affects the bottom line right away. With locally supported 3D printer upgrades, teams keep more control and adjust faster, something you notice in everyday work. Motion accuracy improves, print times drop, and parts come out more consistently from one job to the next.
Experts often say that knowing system limits matters before changing hardware. It sounds simple, but it’s easy to miss.
We found that the rate at which a polymer melts is limiting in many implementations. The pressure required to push the polymer through the nozzle is a sharp function of temperature. If the core is not hot enough, the printer will not be able to squeeze the polymer through the nozzle.
That context helps explain why random upgrades often fall short. Speed and heat need to work together, and motion tuning has to fit the setup, otherwise adhesion and reliability suffer.
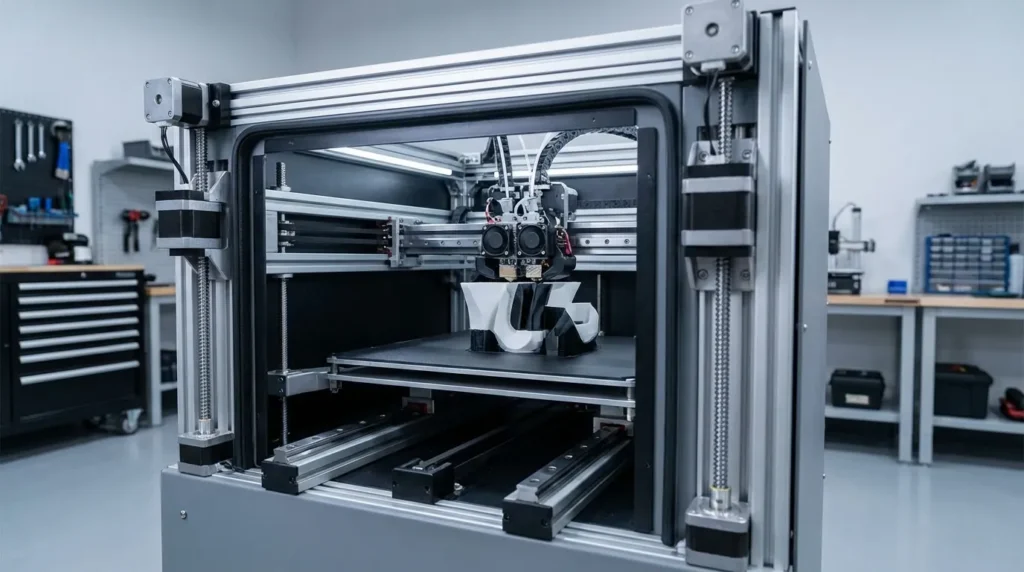
Motion System Upgrades for Speed and Accuracy
The motion system usually sets the real limit for how fast and accurate a printer can be, at least in my experience. Many stock machines use V-wheels and lighter frames. That setup works well enough at moderate speeds, which is what those printers are built for. But as loads go up, those parts can start to flex. Push acceleration too hard and vibration, ringing, or even layer shifts tend to show up, and print quality drops pretty quickly.
What makes this area interesting is how much the right upgrades can change things. Linear rails are a solid choice once speed and accuracy matter more. They lower friction and add stiffness right where motion happens. CoreXY layouts help in a different but related way, and this one really matters. Since the motors stay fixed to the frame, the moving parts have less weight to carry. That usually allows higher acceleration without losing accuracy, and that added control is easy to notice when tuning.
Klipper firmware brings everything together. Features like input shaping and resonance compensation let printers move faster while staying steady. Rather than guessing safe limits, Klipper measures vibration and adjusts motion based on real data. That often explains why the improvements are so obvious when you start pushing a machine harder.
In everyday use, motion upgrades often reduce print times by 30 to 50 percent. Engineers using CoreXY machines for jigs and fixtures also report tighter hole tolerances, and surface finish often gets better too. Still, rails by themselves don’t fix everything. Frame stiffness and careful firmware tuning usually matter just as much.
Extrusion and Hotend Upgrades to Remove Flow Bottlenecks
Extrusion is usually the first speed limit people hit with FDM printing, and it often shows up fast once you start printing quicker, you’ve probably seen it yourself. Standard extruders and hotends can only push a limited amount of molten plastic, and that cap becomes obvious pretty quickly. Research often puts typical FDM build rates around 10 to 20 cubic centimetres per hour at 0.2 mm layer heights. Once printing pushes past that range, pressure inside the system tends to rise fast. In real use, that pressure often leads to visible defects, which is not what most people are after.
| Parameter | Typical Value | Impact on Printing |
|---|---|---|
| Standard build rate | 10, 20 cm³/hour | Limits production speed |
| Max filament feed rate | ≈9 mm/s | Causes under-extrusion at speed |
| Feed force limit | ≈60 N | Extruder slip risk |
High-flow hotends help by extending the melt zone and improving heat transfer inside the hotend, giving filament more time to soften fully. Higher wattage heaters, usually in the 60 to 80 watt range, help keep temperatures steady during fast moves, and that consistency often shows in print quality. Hardened or multi-channel nozzles can also improve flow and last longer with abrasive filaments, which often makes a real difference.
Dual-gear extruders matter too. They grip filament more evenly, so slipping happens less often. That usually means less wasted material and fewer print stops. For industrial users running fibre-filled materials, this upgrade is often necessary.
While additive manufacturing (AM) advances rapidly towards new materials and applications, it is vital to understand the performance limits of AM process technologies and to overcome these limits via improved machine design and process integration.
Thermal Management and Enclosures for Reliable Output
Warping and layer separation are usually the first signs that something’s wrong, especially on long prints that run for hours. Thermal control often gets ignored in those moments, but it directly affects strength and accuracy. Open-frame printers struggle with drafts and sudden temperature changes, like when a door opens or the AC turns on. You’ll often see the damage early, sometimes within the first few layers.
An enclosure helps by keeping the build environment stable and holding heat steady, instead of letting room conditions shift during the day. Day-to-night temperature changes are a common issue. For materials like ABS and nylon-based composites, this usually matters a lot, often more than slicer adjustments. PLA can also benefit during high-speed printing, where cooling needs closer control to avoid rough surfaces or weak areas.
Active chamber heating takes this further by keeping a steady internal temperature for the entire print. This reduces internal stress and helps layers bond more evenly, especially with thicker walls. That’s why it works well for tooling and end-use parts. Studies show tensile strength can drop by up to 27 percent when printing too fast without proper thermal control.
Australian workshops running continuous jobs often notice clear benefits: safer setups, quieter machines in shared spaces, longer-lasting electronics, and much less trouble with dust.
Firmware and Calibration with Slicer Optimisation
Hardware upgrades only pay off when calibration is done right, and yeah, that part is usually slower than anyone wants. Firmware like Klipper gives deeper control, but it needs patience and setup. Input shaping, pressure advance, and material-specific temperatures need attention, and small tweaks can matter more than expected at higher speeds.
It’s tempting to treat calibration as a one-time chore, but it works better as a regular workflow. Extrusion tuning, bed mesh checks, and motion testing help prevent problems later. In many cases, 3D printer upgrades fail not because of hardware, but because calibration never really happened.
Slicer profiles are just as important. High-speed PLA and PETG blends melt and bond faster, so default settings often hold performance back. Adjusting line width, acceleration, and cooling, especially with upgraded fans and ducts, can make a clear difference. Documenting profiles helps teams get consistent results.
Putting These 3D Printer Upgrades to Work in Real Applications
What stands out first is how far upgraded FDM printers have come. Jobs that once belonged only to large industrial machines are now handled in smaller shops, which still surprises some people. In Australia, manufacturers use them for jigs, fixtures, and short‑run tooling right on the factory floor. Universities rely on them in advanced teaching labs, often for hands‑on materials work. Product teams also use them for functional prototypes, printing in days instead of weeks, which often changes how teams iterate.
The biggest gains usually show up when upgrades work well together. Motion, extrusion, thermal control, and firmware all need to support the same goal. Miss one, and new limits appear quickly. Start with a clear aim, faster prototypes, stronger parts, or smoother surface finish, and upgrade only what gets you there. When those choices line up, a well‑built FDM system can deliver industrial‑grade performance at a much lower cost (in most cases), like improving strength without slowing print times.
Take the Next Step Toward Better Printing
Turning a printer into a real production asset usually comes down to steady output per build hour, not chasing top speed. Better print performance takes time, and it often needs several changes working together, since shortcuts rarely hold up in real use. One useful approach is to look at where a setup actually hits its limits. You’ll often see that speed, accuracy, and failure rates are linked, so looking at them together really matters. Planning upgrades that support each other, instead of competing, helps avoid problems that tend to show up more often than expected.
For Australian professionals, systems and parts with local support often cut risk and downtime, saving a few headaches along the way. It’s usually smarter to put reliability first and only push speed once things are stable. That’s how you end up with fewer failed prints and more predictable output per build hour.
