Upgrade to Bigtreetech SKR Pico V1.0 with Klipper – beginner guide
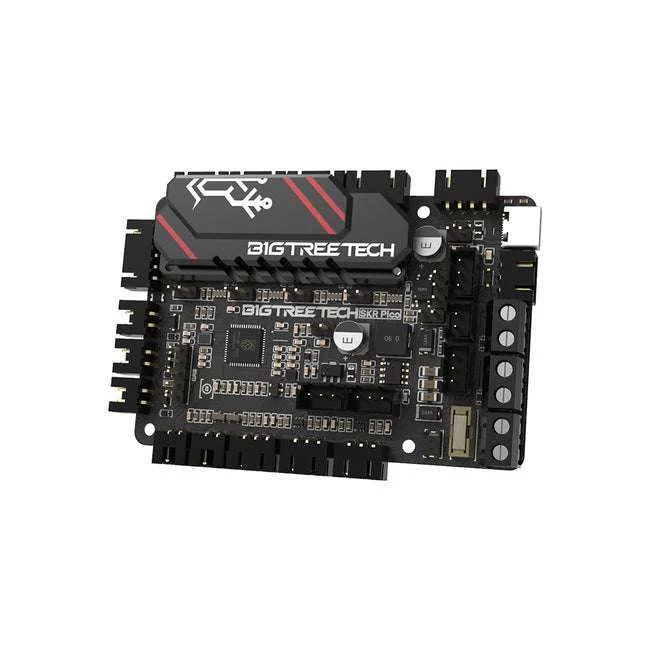
Upgrading your printer’s controller can feel daunting, especially if you’re new to firmware like Klipper. This guide walks you through the whole process – from gathering the right parts to getting a stable Klipper controller setup – using the Bigtreetech SKR Pico V1.0. By the end you’ll have a solid foundation for further tweaks and upgrades.
What you need before you start
Gather these items so you don’t have to pause mid‑project:
- A Bigtreetech SKR Pico V1.0 board.
- A USB‑C cable that can transfer data (not just charge).
- Screwdrivers that match the mounting holes on your printer.
- Heat‑shrink tubing or electrical tape for securing wires.
- A computer with internet access to download Klipper and the flashing tool.
- Basic safety gear – safety glasses and a static‑free workspace.
Make sure you have the original controller’s wiring diagram handy. You’ll be matching pins on the SKR Pico to the same functions on your printer.
Preparing the Klipper firmware
The first technical step is to obtain the correct Klipper source code and configure it for the SKR Pico. This is often referred to as a “SKR Pico Klipper install”.
- Open a terminal on your PC (Windows PowerShell, macOS Terminal or Linux shell).
- Clone the Klipper repository: git clone https://github.com/Klipper3d/klipper.git. If you prefer not to use Git, download the ZIP from the same page.
- Enter the folder: cd klipper and run make menuconfig.
- In the menu, select Micro‑controller Architecture → STM32, then choose Processor model → STM32F0. Set the Bootloader offset to 32KiB (the default for the Pico). Choose Communication interface → USB (serial).
- Save and exit. This creates a klipper.bin file ready for flashing.
If you are unsure about any option, refer to the official Klipper documentation – it provides clear explanations for each setting.
Wiring the SKR Pico to your printer
Connecting the new board is the heart of the upgrade 3d printer controller process. Follow these general steps, but always double‑check against your printer’s manual.
- Power off the printer and unplug the mains.
- Remove the old controller and label each wire (stepper, endstop, thermistor, heater, fan, etc.).
- Locate the matching pins on the SKR Pico. The board’s silkscreen labels the pins clearly – for example, E0‑STEP for the first extruder stepper.
- Using the labelled wires, connect each function to the corresponding SKR Pico pin. Keep the wiring tidy to avoid accidental shorts.
- If your printer uses a heated bed, ensure the MOSFET pins are correctly matched. The SKR Pico can handle typical bed currents, but verify the rating in the board’s documentation.
- Secure all connections with heat‑shrink tubing or tape.
- Re‑mount the SKR Pico in the printer’s electronics bay, using the same screws that held the old board.
When you’re satisfied, double‑check that no wires are pinched and that the USB‑C port is accessible for flashing.
Flashing Klipper onto the SKR Pico
Now you’ll flash the klipper.bin you built earlier onto the board. This step completes the Klipper controller setup.
- Connect the SKR Pico to your computer via the USB‑C cable.
- Put the board into bootloader mode. On most SKR Pico units, you hold the BOOT button while plugging in the USB cable, then release the button.
- On your computer, run the flashing tool. For Windows you can use dfu-util, on macOS/Linux the same command works: dfu-util -a 0 -s 0x08000000:leave -D out/klipper.bin. Adjust the path if your build placed the file elsewhere.
- The tool will report progress and finish with a “Done” message. The board will reboot automatically.
If the flashing fails, repeat the bootloader step and ensure no other USB devices are interfering.
Configuring Klipper for your printer
With the firmware on the board, you now need a configuration file that tells Klipper how your printer is wired.
- On your PC, open the printer.cfg file that comes with the Klipper example configs (usually in config/).
- Copy the section that matches your printer’s architecture (e.g., Voron, VzBoT). Replace the generic pin names with the exact pins you used on the SKR Pico.
- Set the microcontroller line to serial: /dev/serial/by-id/usb-...-if00 (Linux) or the appropriate COM port on Windows. The exact string appears in your OS’s device manager after the board reboots.
- Save the file and upload it to the Raspberry Pi (or other host) that will run Klipper. Use scp or a file share as you prefer.
- Restart the Klipper service (e.g., sudo service klipper restart) and open the web UI (Moonraker/Fluidd or Mainsail).
At this stage you should see the printer’s temperature readouts and be able to jog the axes. If something looks wrong, revisit the wiring table and the printer.cfg pin assignments.
Testing and fine‑tuning
Before you start a real print, run a few safety checks:
- Heat the hotend and bed to a low temperature and verify the thermistor readings are accurate.
- Command each axis to move a few millimetres; watch for smooth motion and correct direction.
- Trigger each endstop manually and confirm Klipper reports the correct state.
Once the basics are solid, run a short calibration print (e.g., a 20 mm cube). Observe the results and adjust stepper current settings in the SKR Pico’s config.txt if needed. The board’s web interface lets you tweak these values without reflashing.
Congratulations – you have completed the Bigtreetech SKR Pico guide and now have a modern Klipper controller powering your printer. The combination of the SKR Pico and Klipper offers faster prints, smoother motion and a more responsive UI, all while keeping the setup approachable for beginners.
Conclusion
Upgrading to the SKR Pico V1.0 is a rewarding project that brings your printer into the latest generation of open‑source control. By following this guide you’ve covered the essential steps: gathering tools, preparing Klipper, wiring, flashing, configuring and testing. Should you run into a snag, the Klipper community forums and the board’s documentation are excellent resources. Happy printing!